Creating Account and Logging in (Teachers)
Teachers under one organization can use one same token to create their accounts. No need to order separate tokens for different accounts.
To create your account, open Google Chrome and go to the login site based on your region:
EU:
https://eu.connect.sanako.com/
US
https://us.connect.sanako.com/
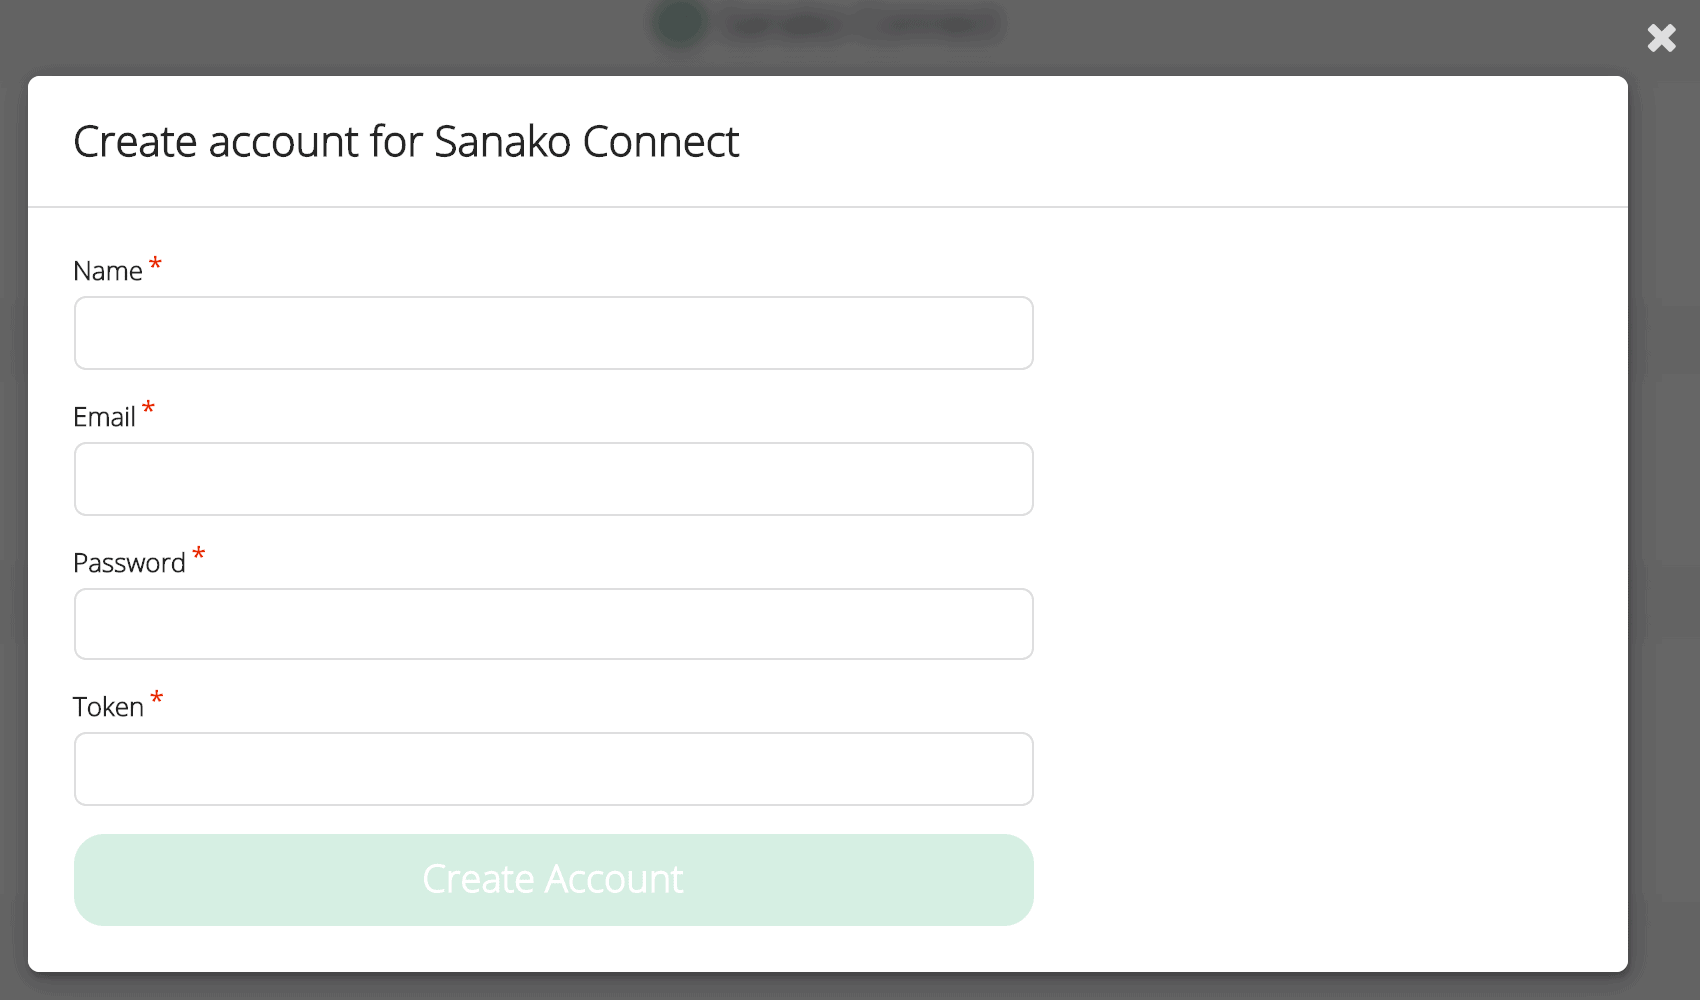
Select Create Account.

Fill in your contact details and paste the token in the Token field then click on Create Account.
If you have an account already created, simply choose the Log in option and fill in the email and password used in your registration.
Creating and Sharing a session
Once logged in, you will arrive at the Sessions page where you can see all active and ended sessions you have created. Select New Session to begin creating your first session.

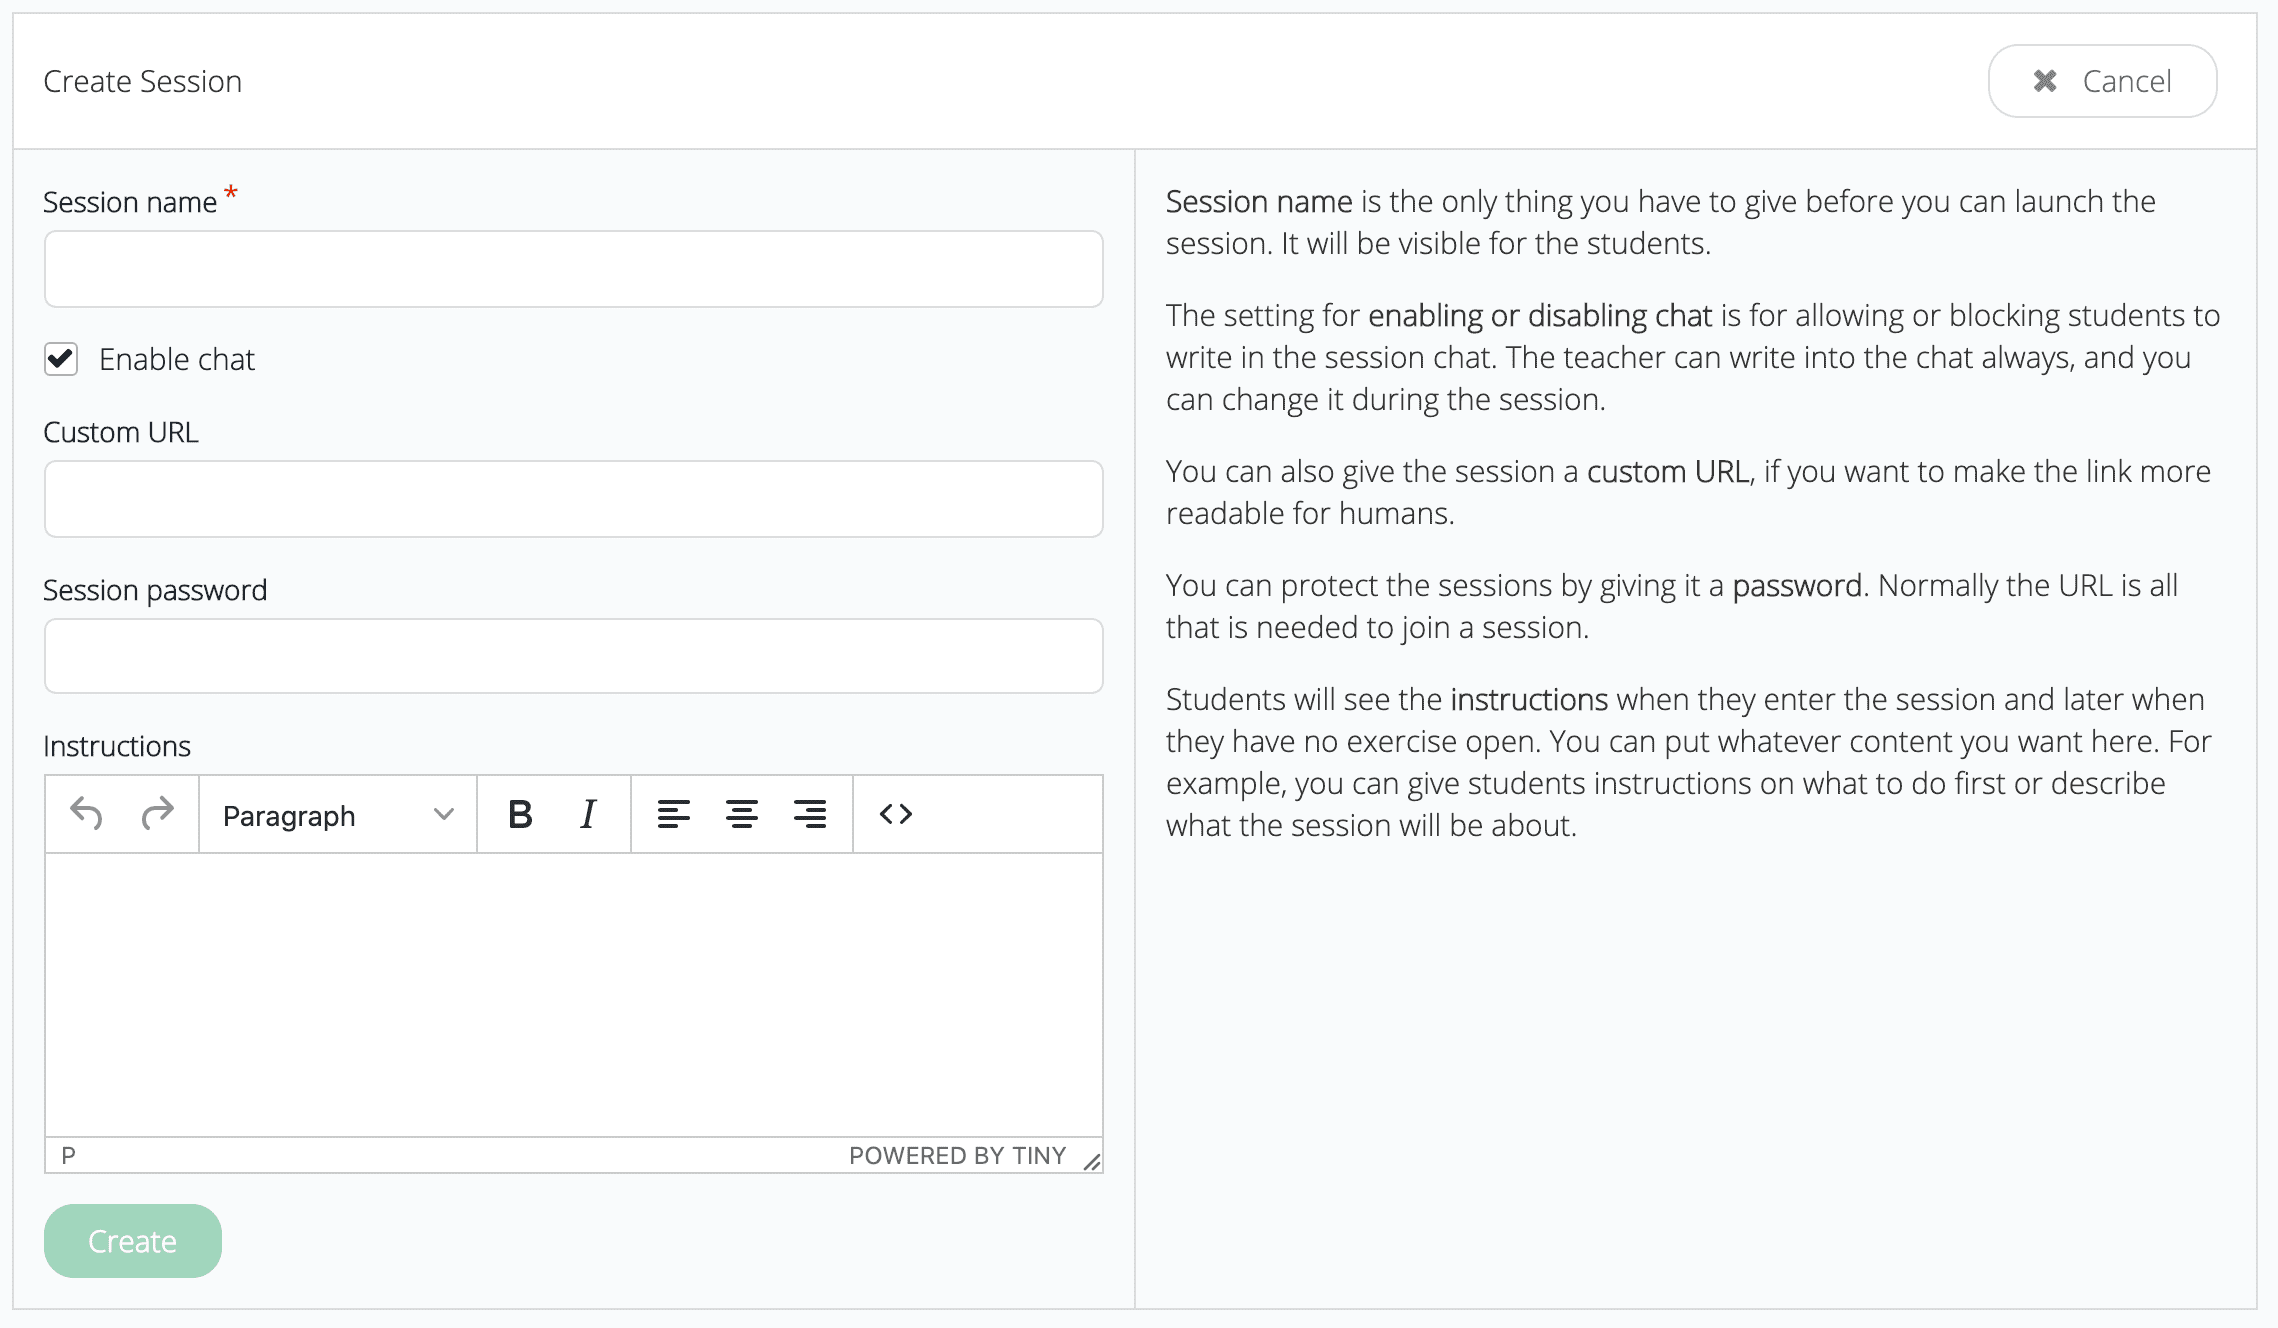
Click on the Session name field and insert a suitable name for your session, for example, ‘English’. Next click on Create. You can also set a password here to protect the session from unwanted access.
When you have a session created, click the Copy to clipboard (1) button to copy the session URL. You can share this URL (via email, LMS etc. ) with your students and they will join the session after clicking the URL link.
You can also copy the link directly from the address bar of the browser after entering the session to share with students as well.
Now click on Go to session (2) to enter the session as a teacher.

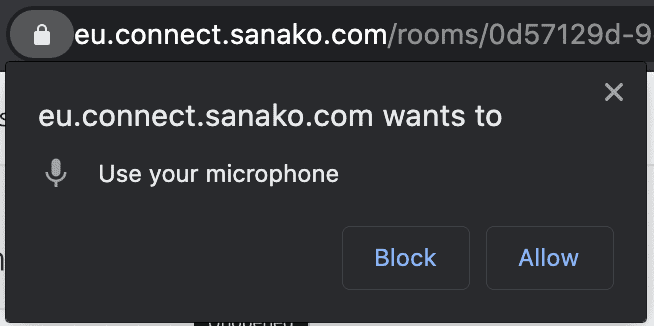
Next, your browser will ask for permission to use your microphone. Using your microphone is essential to Sanako Connect, so click on ‘Allow’.
taloin avain
Splitting students into groups
Upon entering the session, a teacher will see all students in her classroom view:
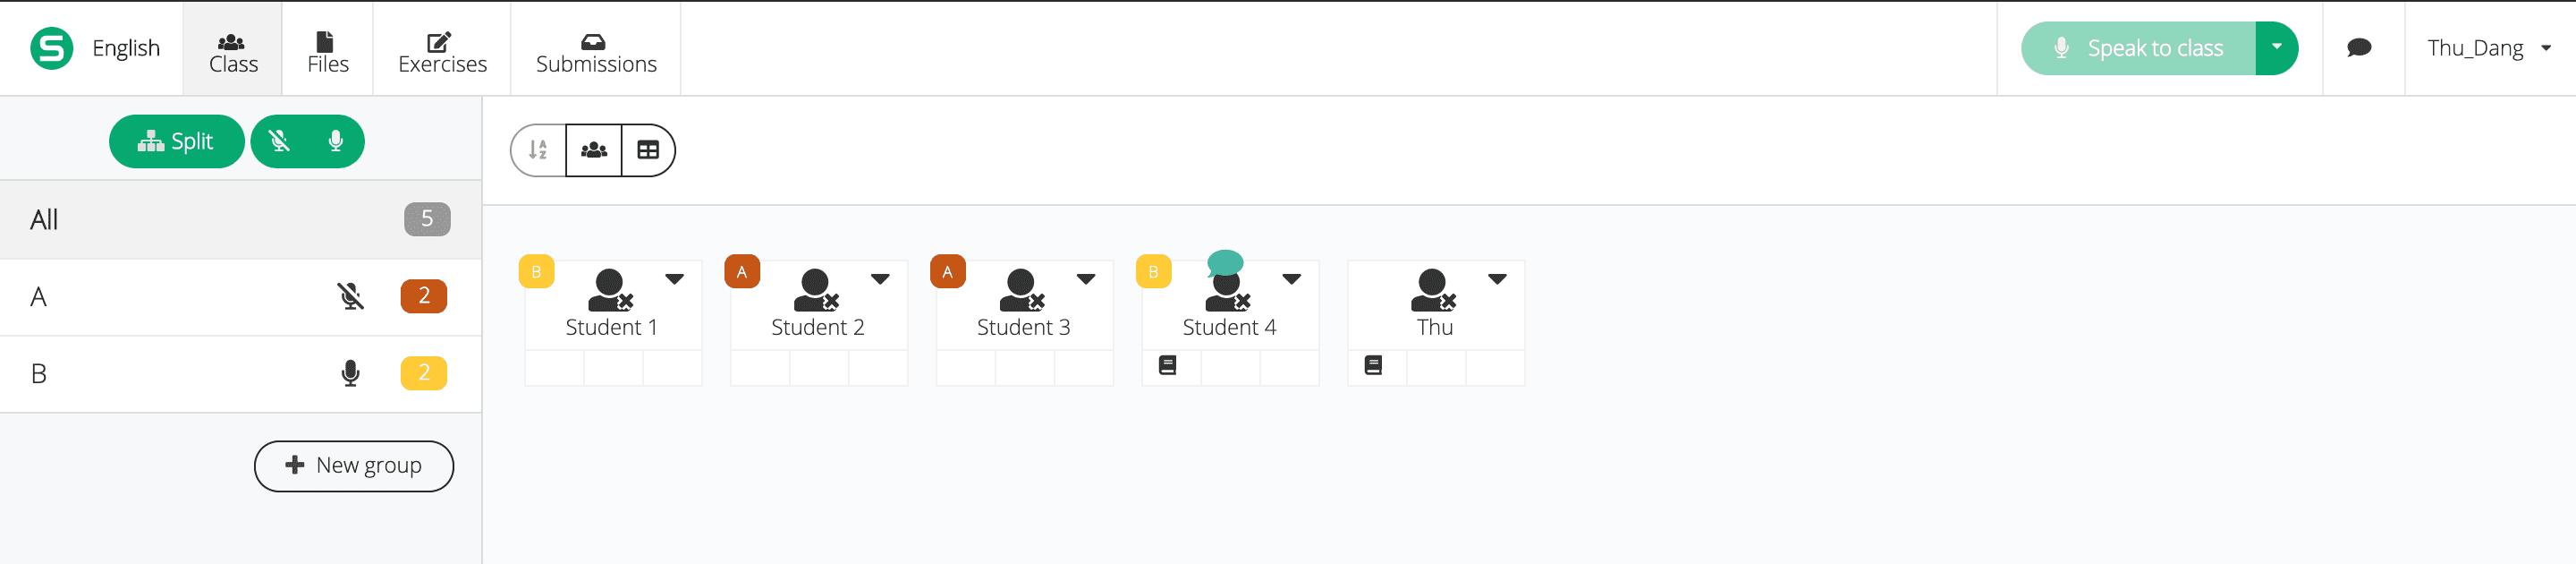
To divide students into groups, a teacher can create new groups and then click on a student profile to assign him/her to a particular group.

Sanako Connect allows automatic grouping as well using ‘Split’ to divide students into pairs or groups of certain sizes.
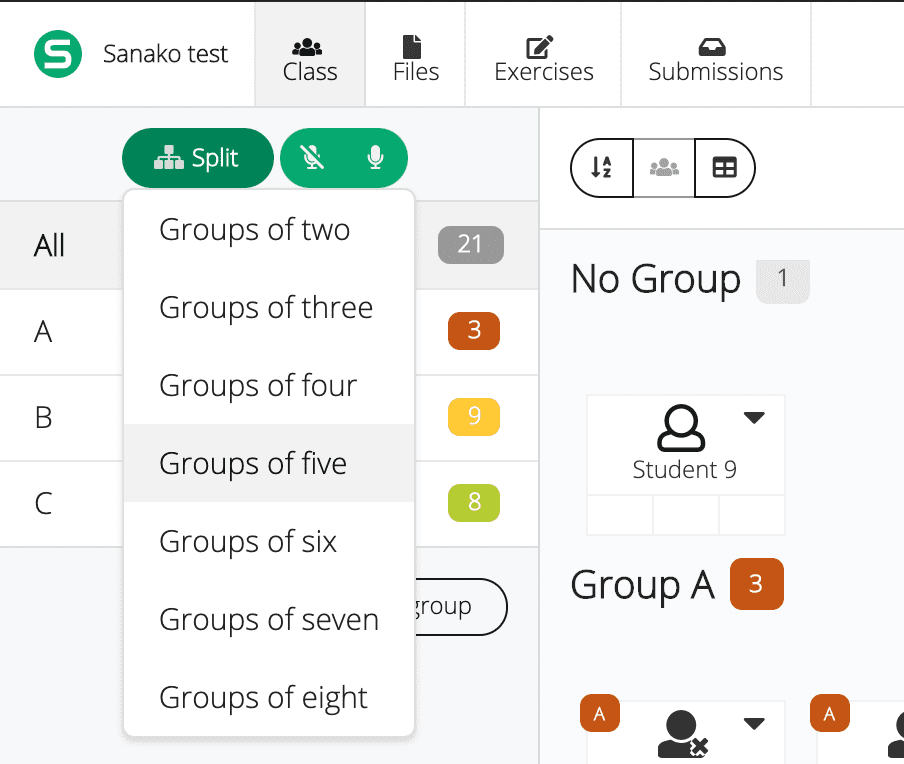
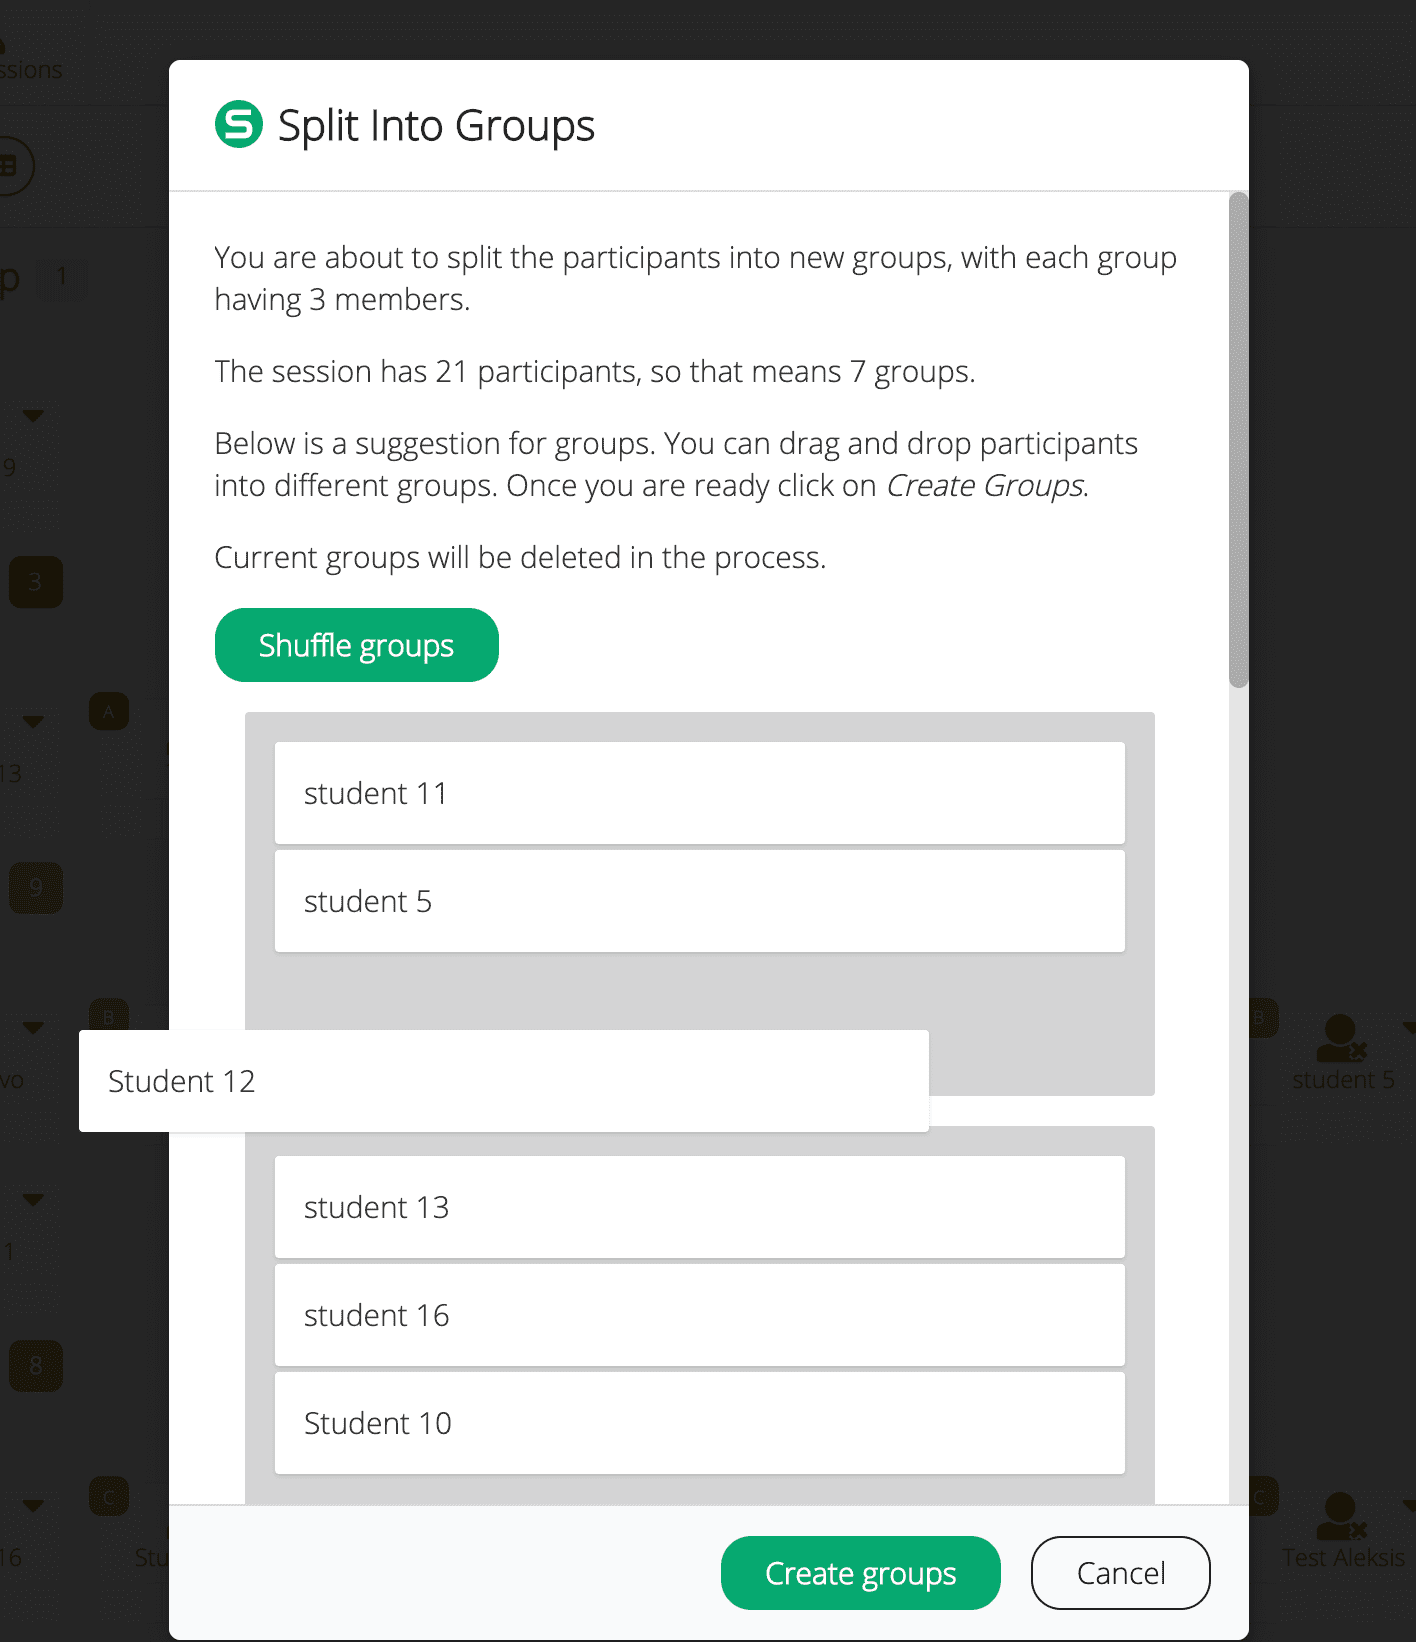
Created groups are already shuffled, however, you can click Shuffle groups to change groups automatically, or you can click and drag students to manually divide students based on your preference. Once done, choose Create groups to finish the grouping.
After that you will see a small icon on each student illustrating the group that he/she belongs to.
Communication inside Sanako Connect
AUDIO
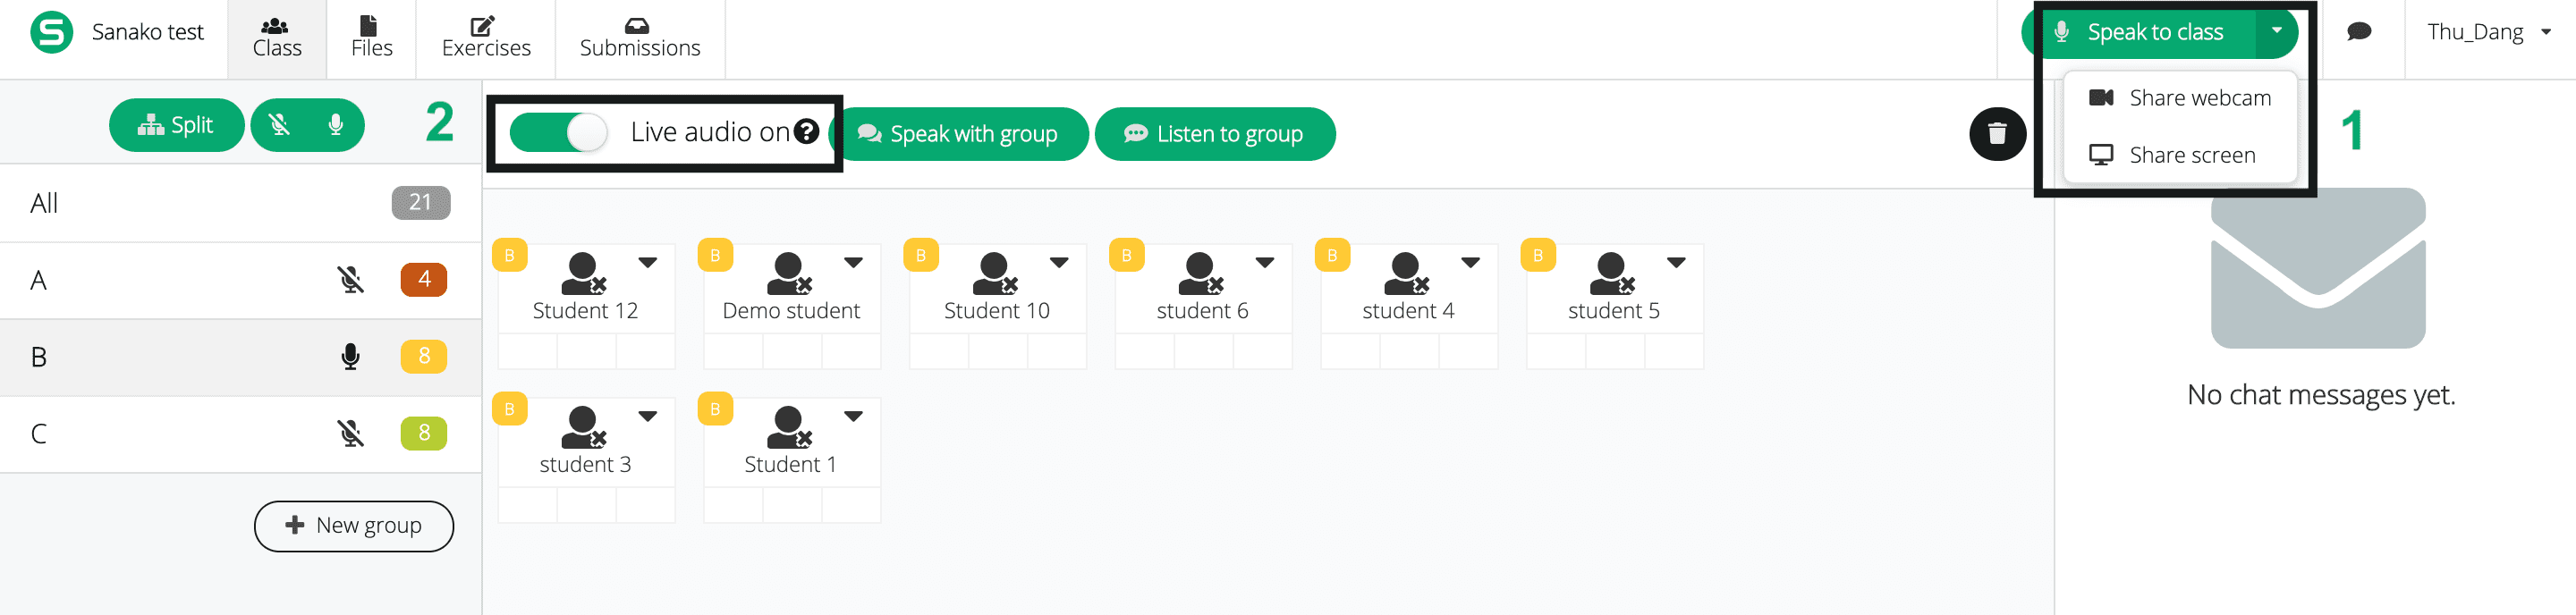
A teacher can choose (1) Speak to class to speak to all students. However, with this option, it’s only one-way communication where teachers can’t hear what students say to them. Thus, this option would be more suitable for making class announcement, for example.
The second option is enabling (2) Audio on to speak with a particular group. The group can also include all the students so you can have two-way communication with the whole class. At the same time, one can choose to listen to a group without speaking to them.
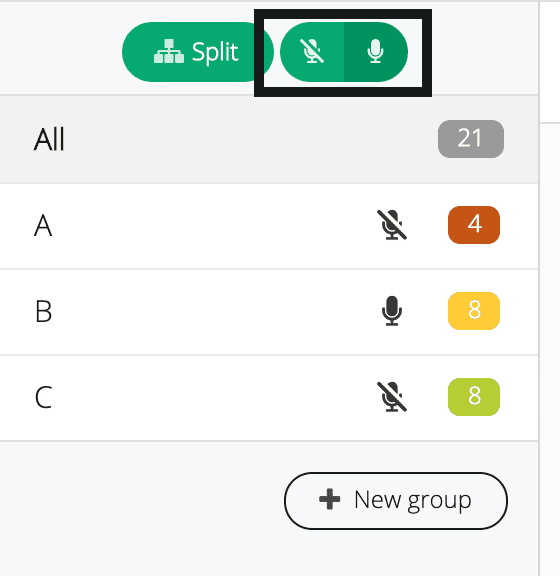
To quickly allow students in all groups to be able to speak and listen to each other, one can choose the Audio on for all groups/ Mute all groups option on top of all the groups displayed.
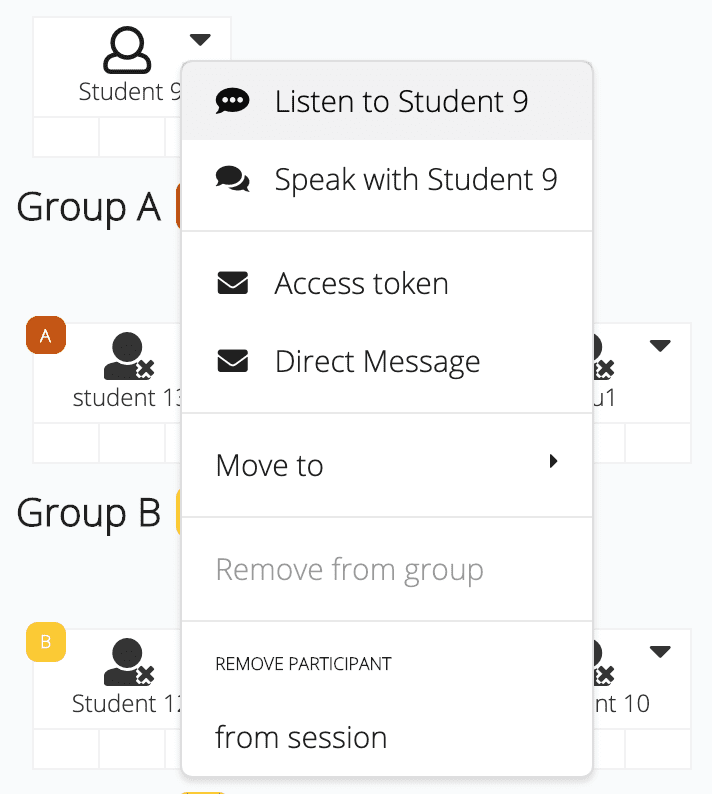
A teacher can also choose to listen or speak to an individual by choosing a student and choose the corresponding action that they want to perform.
CHAT
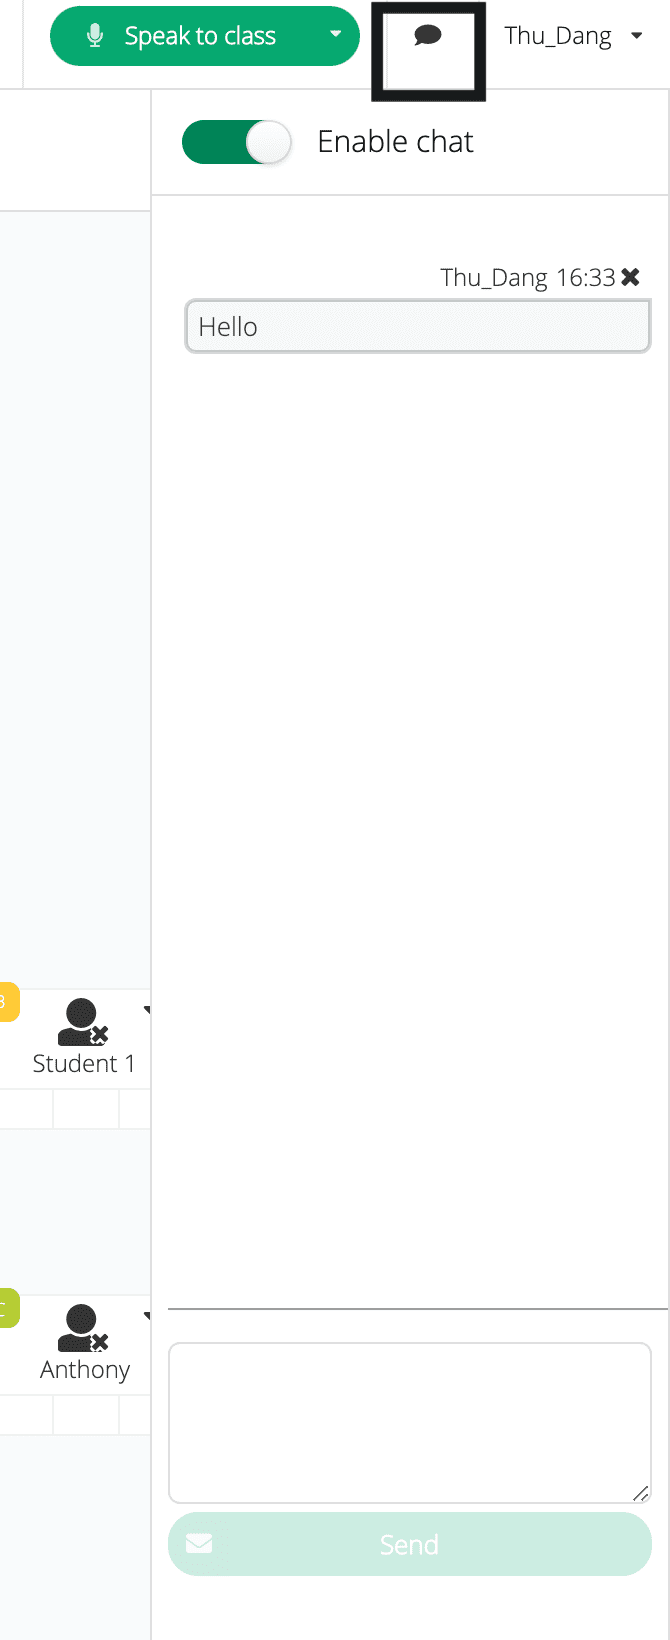
Sanako Connect also supports chatting so that teachers can chat with students either as a group or send direct message to one student upon clicking on their profile.
To chat with all students, teachers can use Global chat function as below:
File sharing within a session
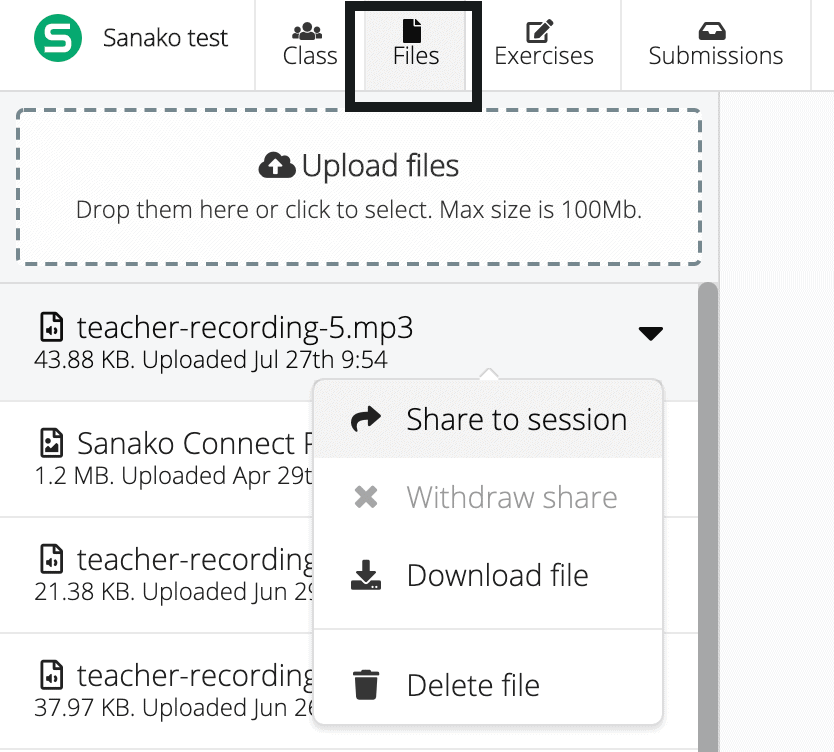
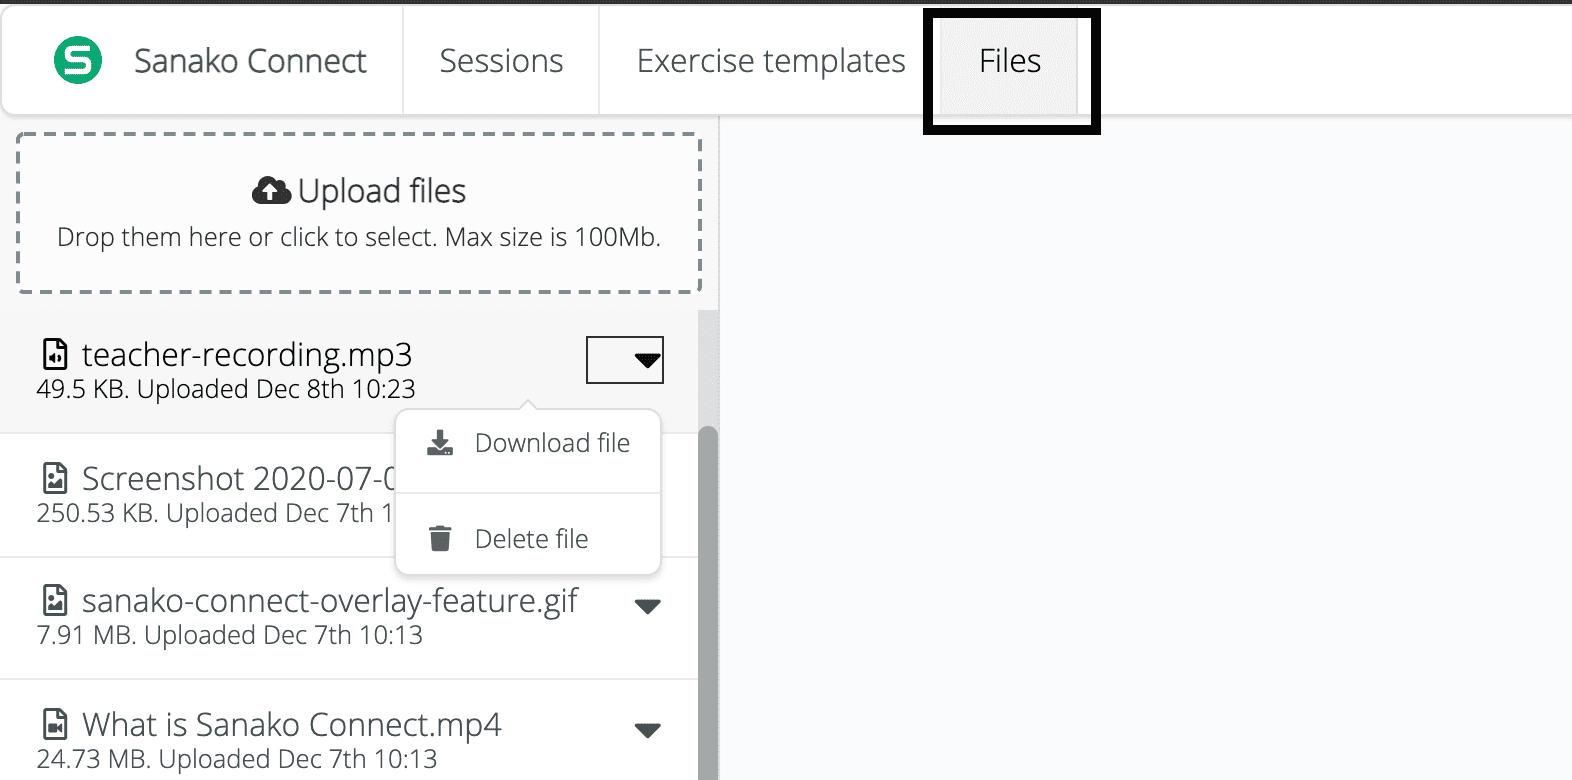
To share files, click Files and then you can simply drag and drop files to upload them to the system. After that, you can either share the file to the session, withdraw sharing, download or delete it.
Sanako Connect supports all types of files, as long as the size is under 100Mb. However, if your browser cannot open a particular type of file, there is always an option of downloading it to your computer and viewing it on a suitable local program.
Creating and Previewing Exercises
In the Exercises tab, you can create new exercise, give them a name and select Editor to create different types of exercises. Please remember to Save your progresses regularly to avoid wasting effort.
Inside the Editor, there are 2 main parts:
- Content: Elements that provide students with information, instructions or knowledge.
- Tasks: Elements for students to work on, the “action” part inside an exercise where students need to return their answers.

After creating the exercises, you can select Preview to see how the exercise would look like on the student view.
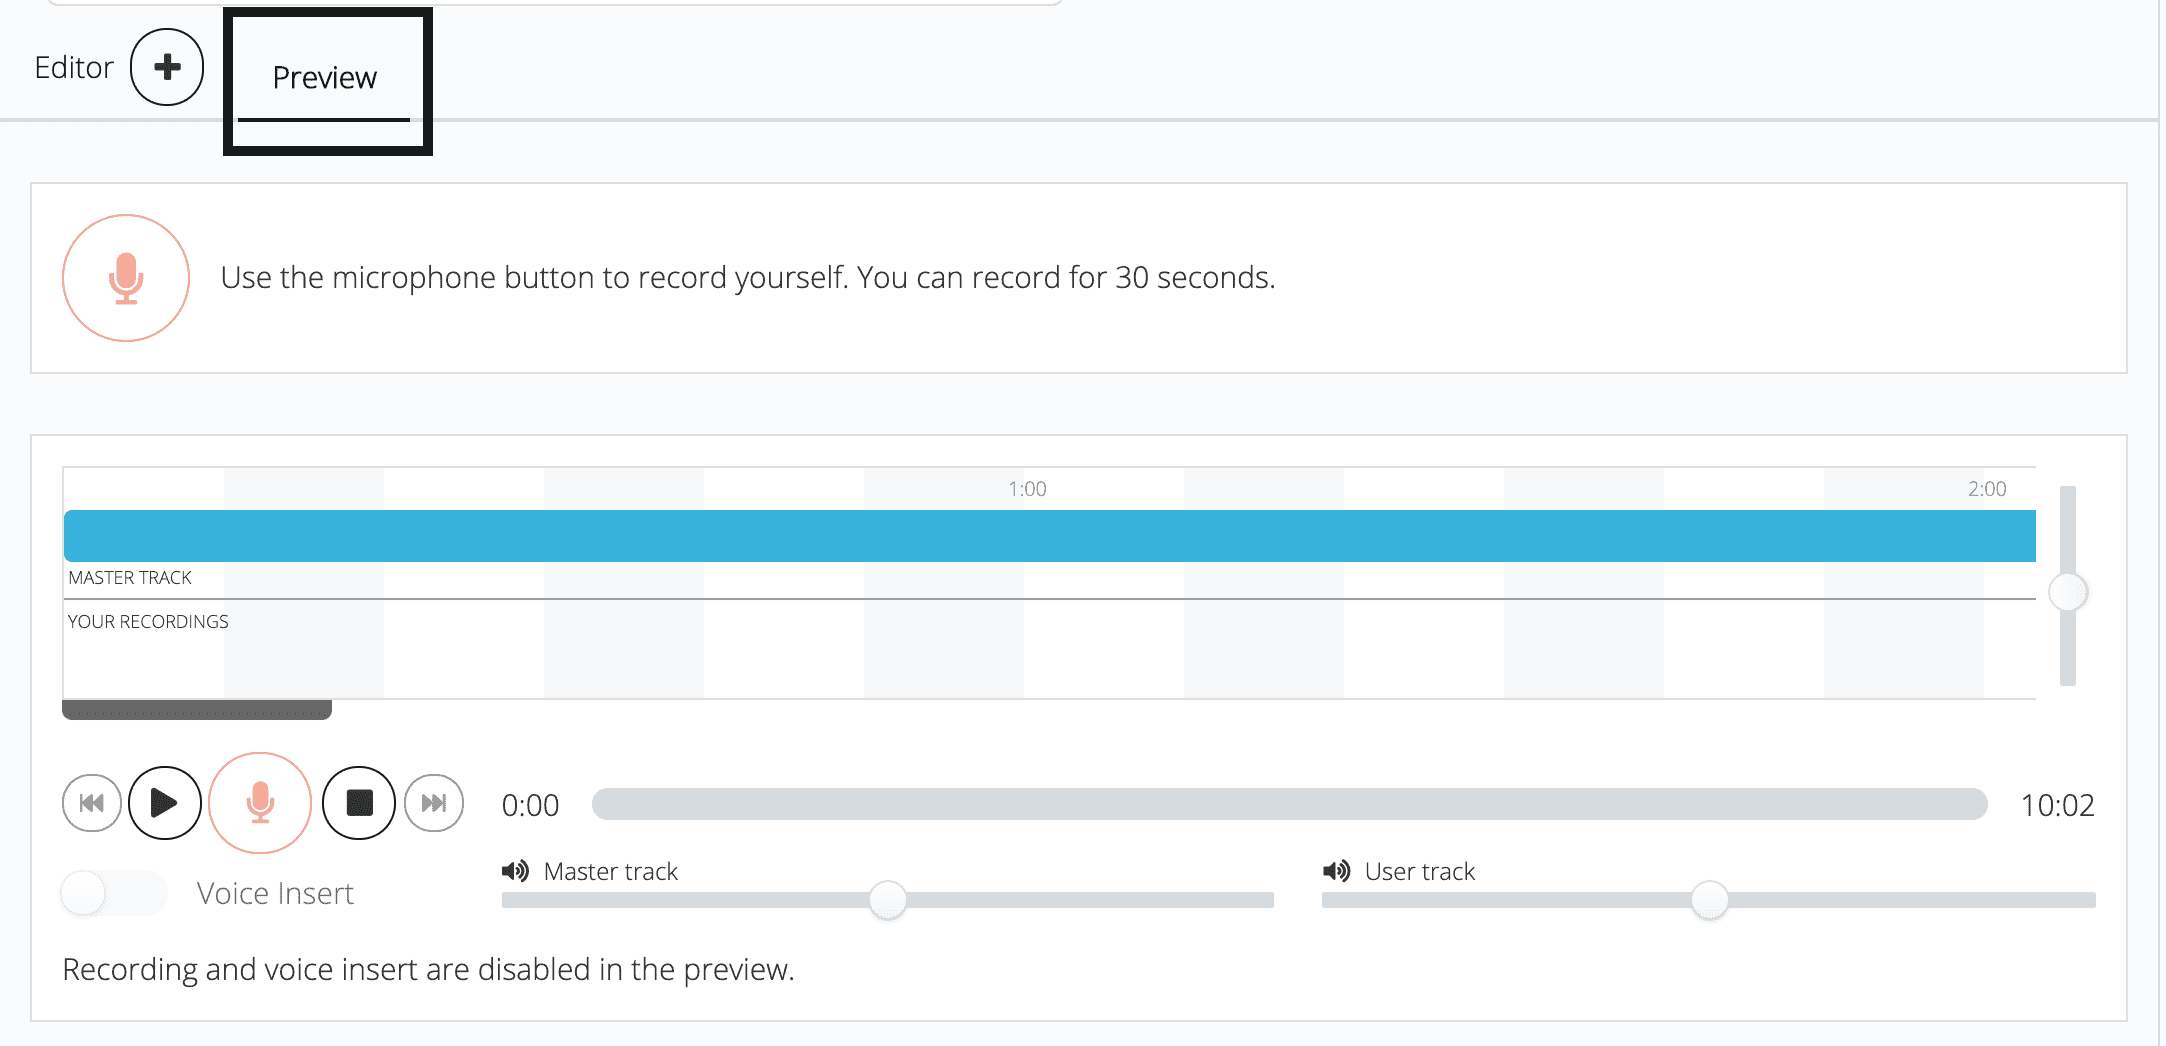
Difference between Simple and Advanced Recorder
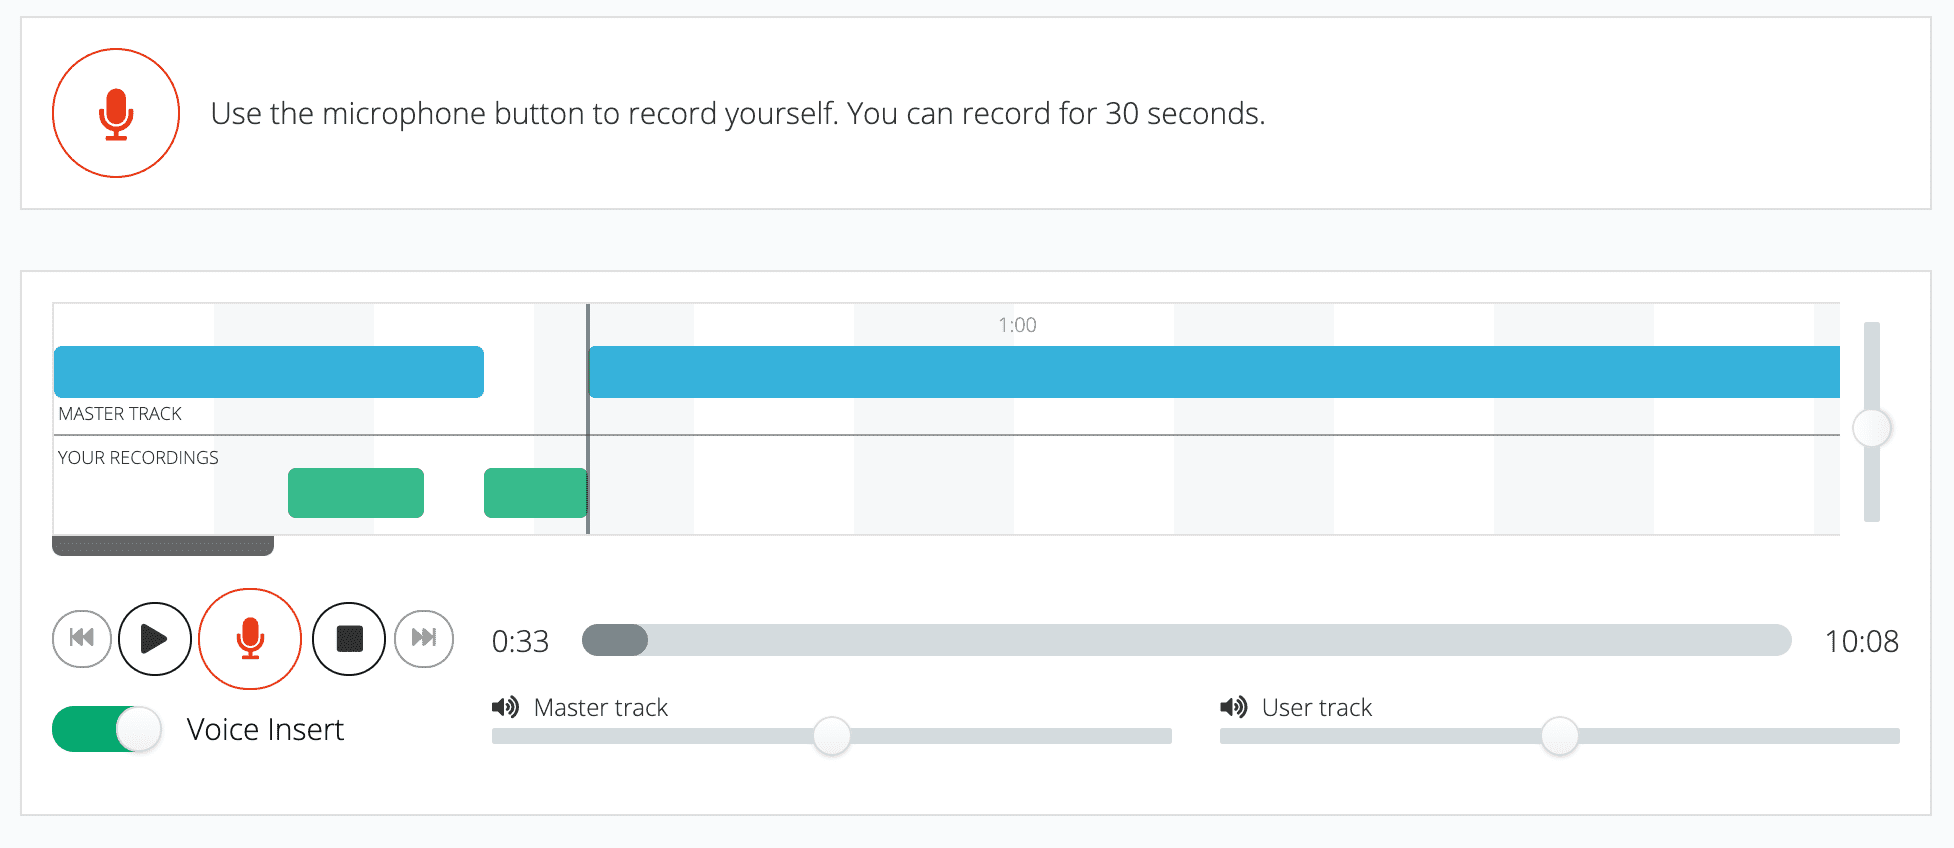
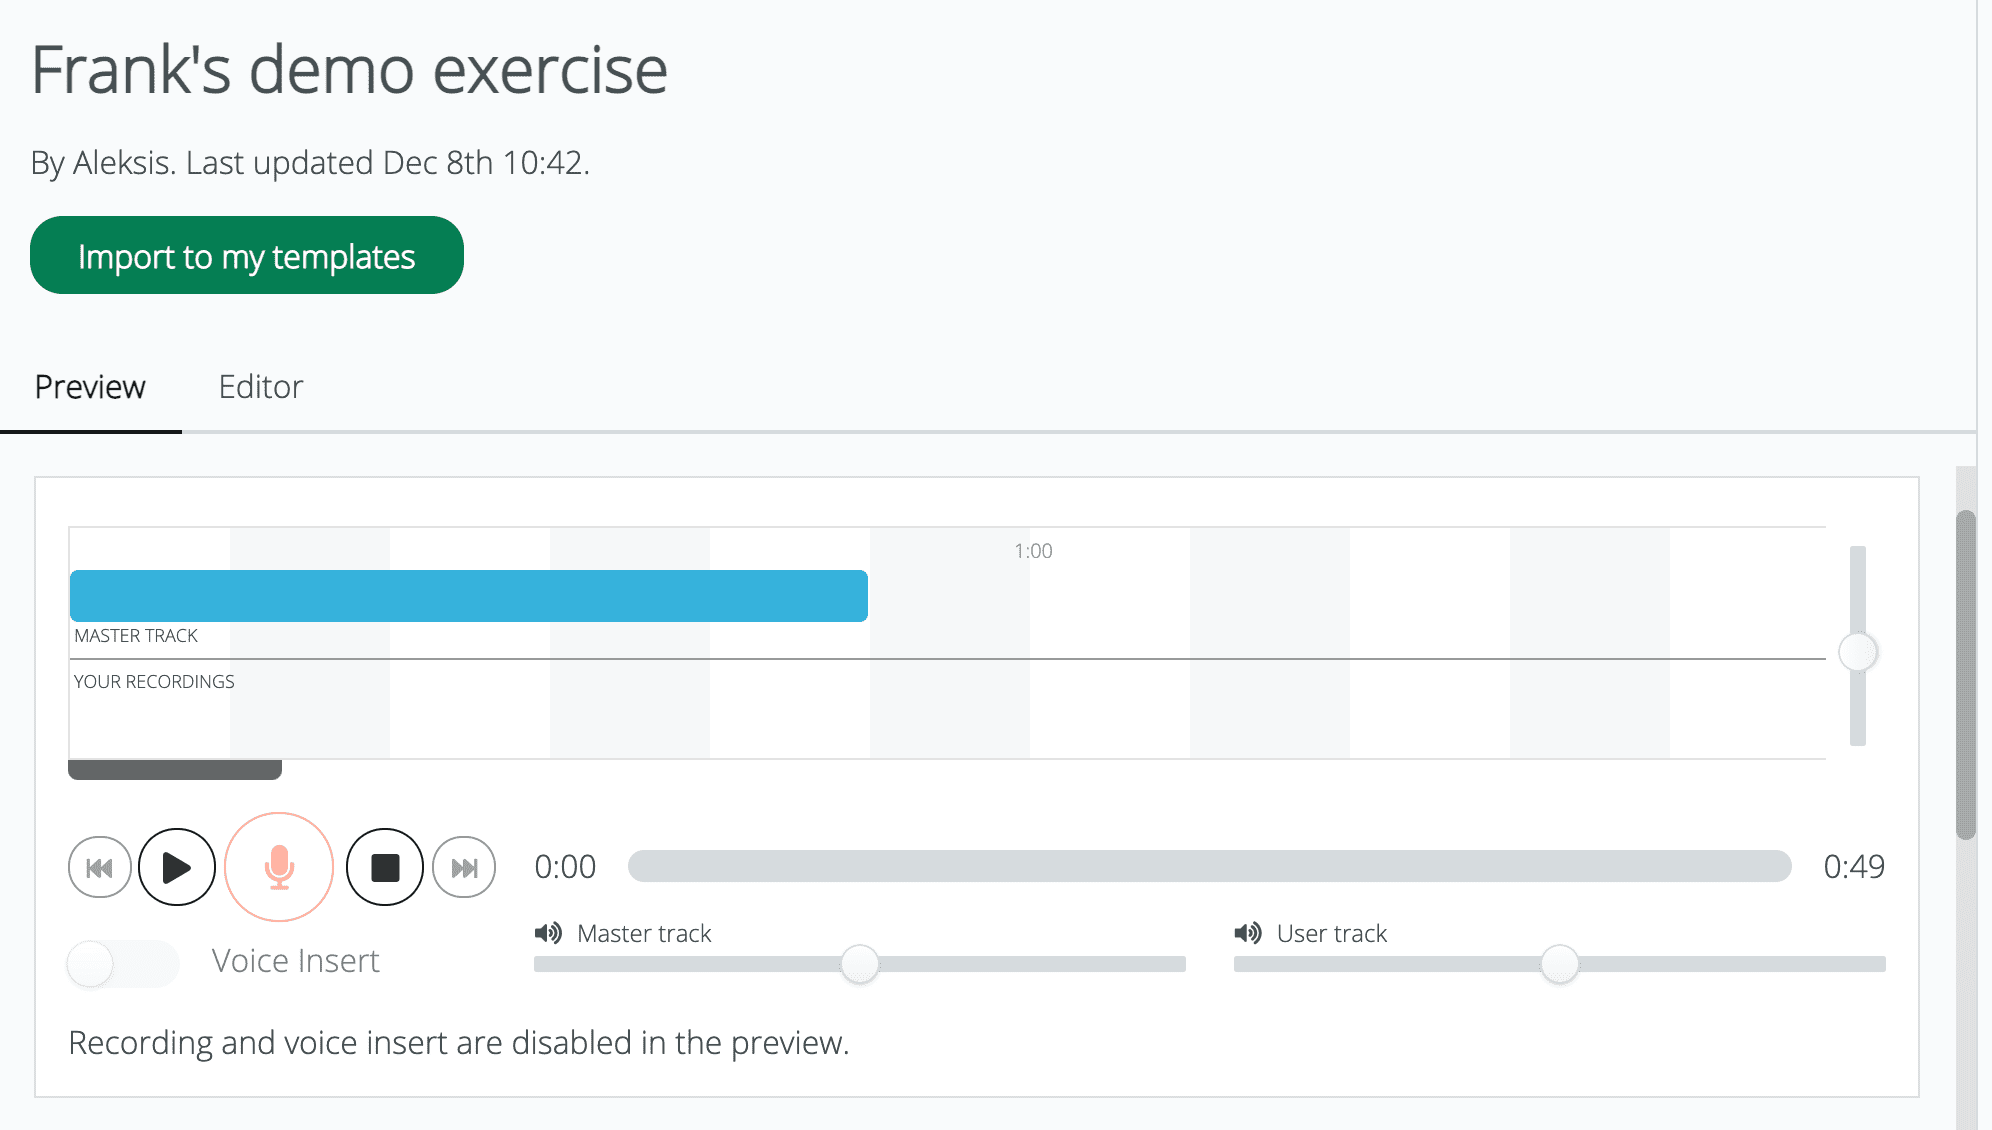
The simple recorder (the upper one in the picture below) allows students to record either individually or in pairs/groups.
The advanced recorder (the lower one in the displayed picture) is a two-track recorder which allows the use of a ‘master audio file’ and the Voice Insert function. The Voice Insert function has to be enabled by the student for it to take effect.
From the picture, the red bar above is the original ‘master audio file’ while the green bars below are a student’s recording. Without using Voice Insert, students’ voices will be recorded alongside the master file (the first green part), whereas with the function turned on, students can make a space and insert their voice into the original track (the second green part).
Viewing submissions and giving feedback
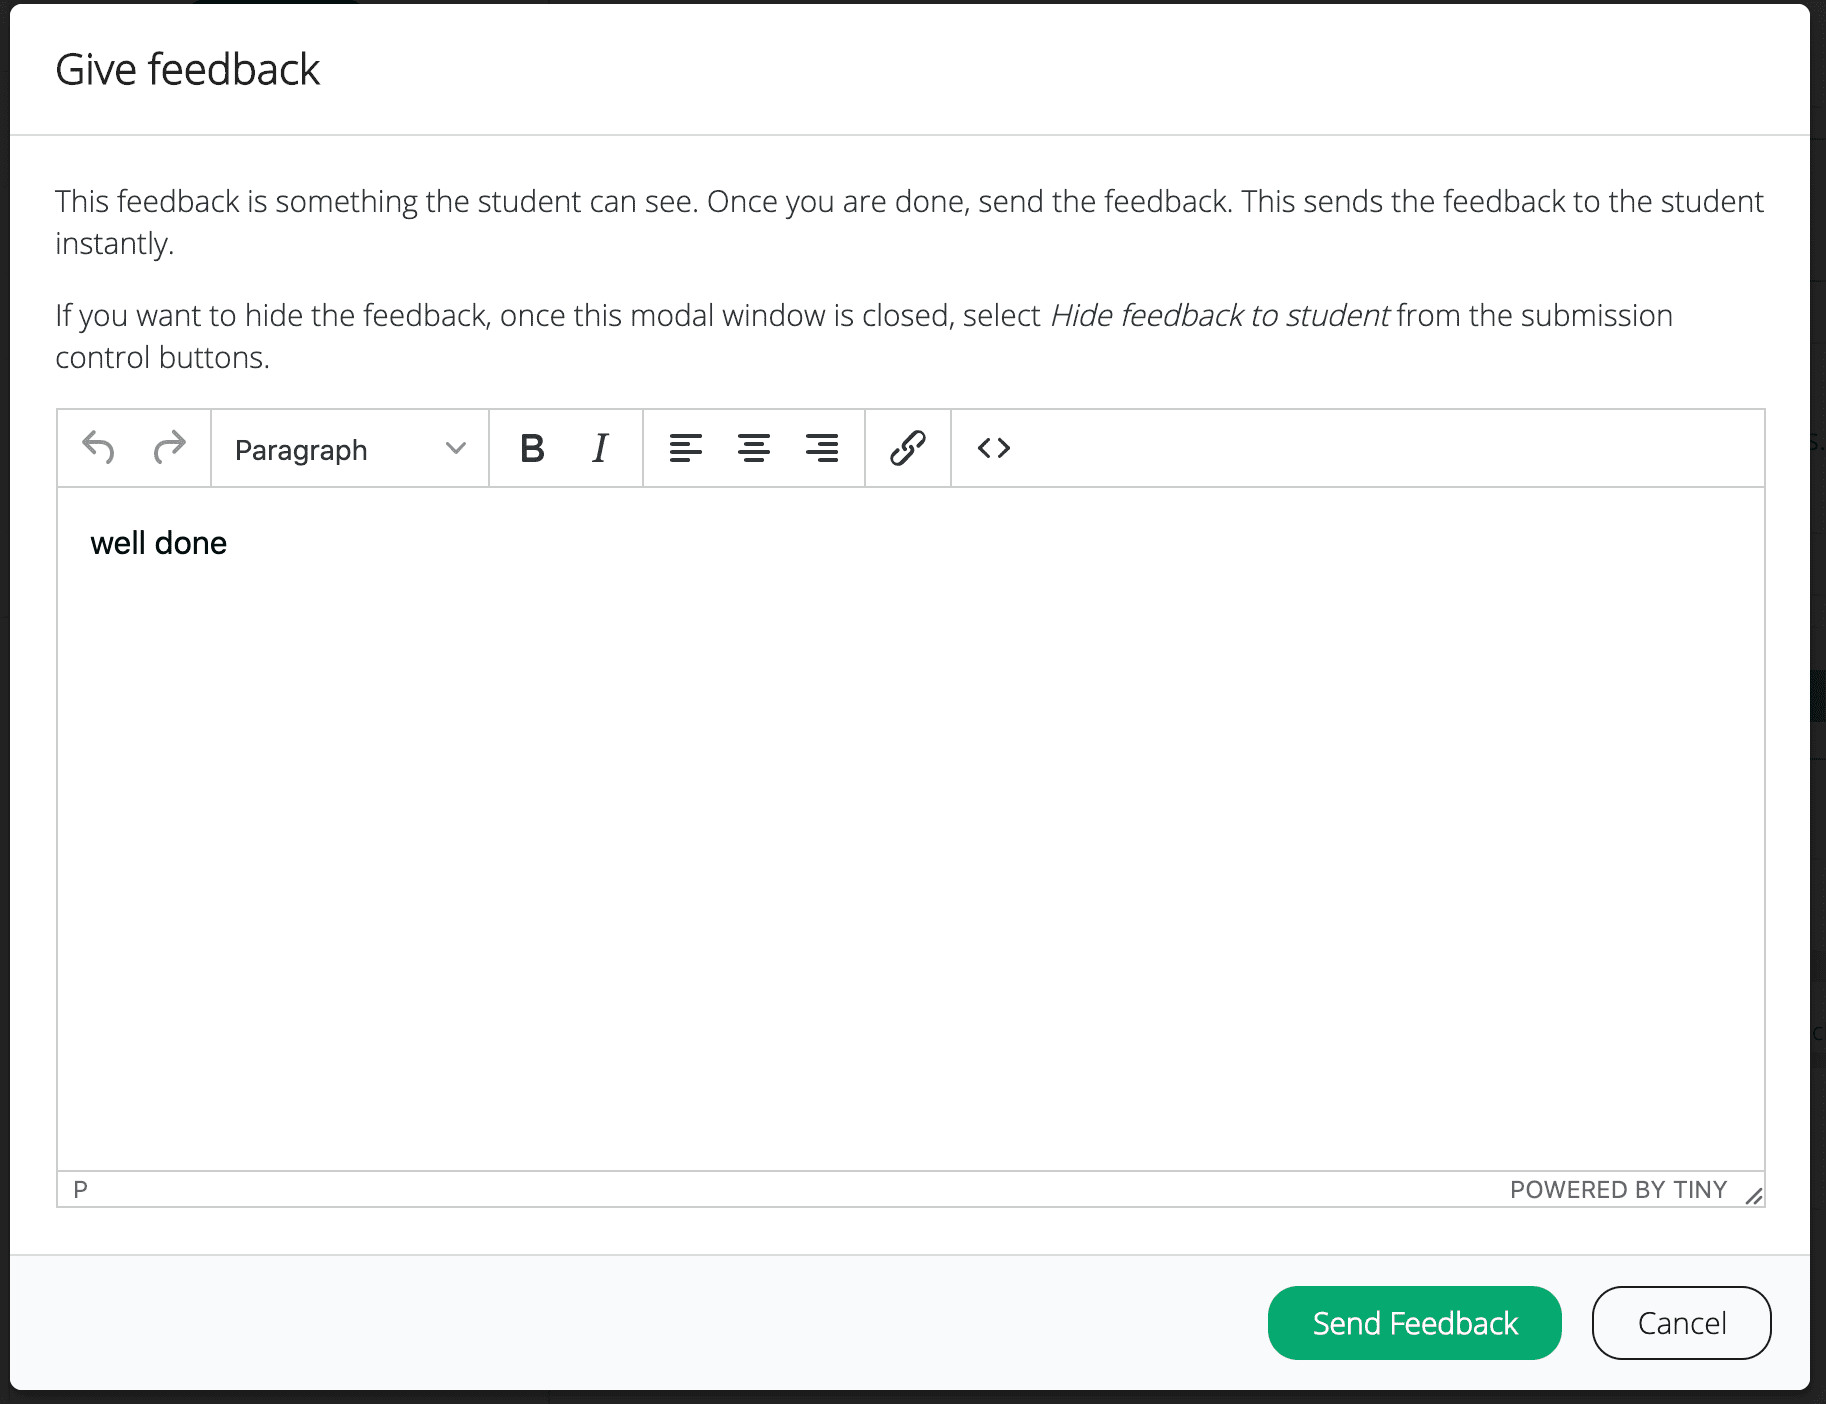
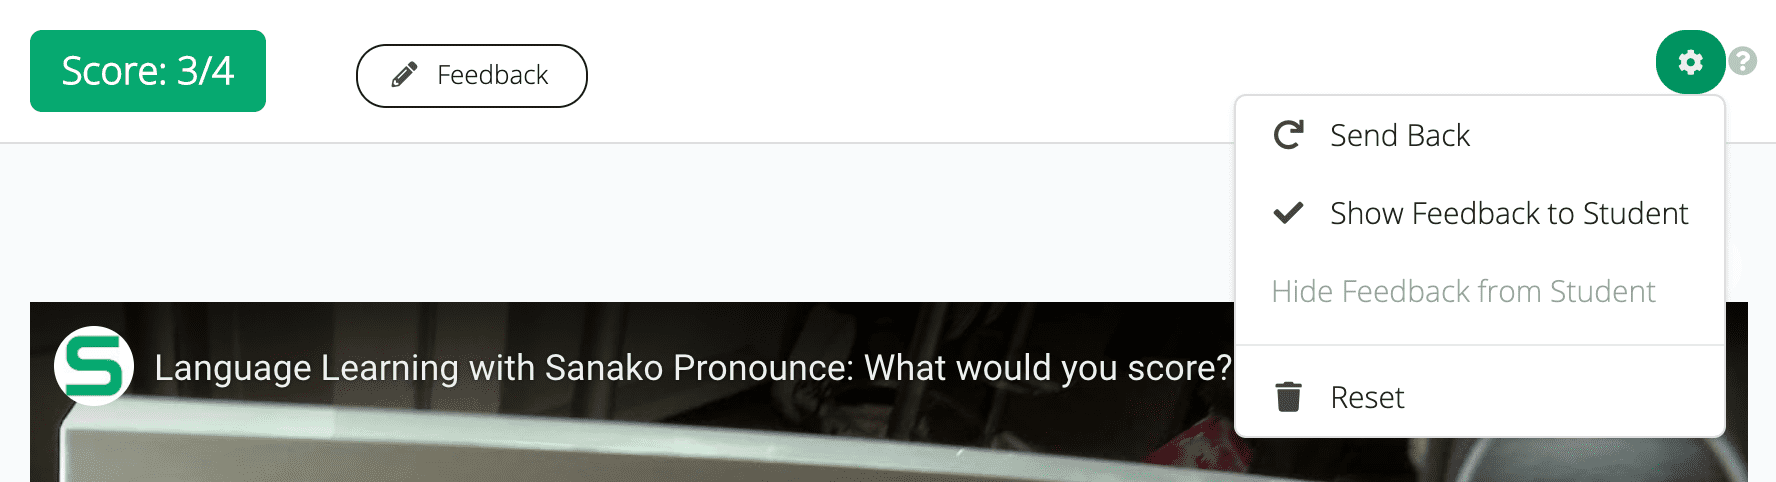
To view students’ submission, you can go to Submissions tab. Here, a teacher can click on Feedback to open the pop-up where he/she can write feedback for the work a student has done.
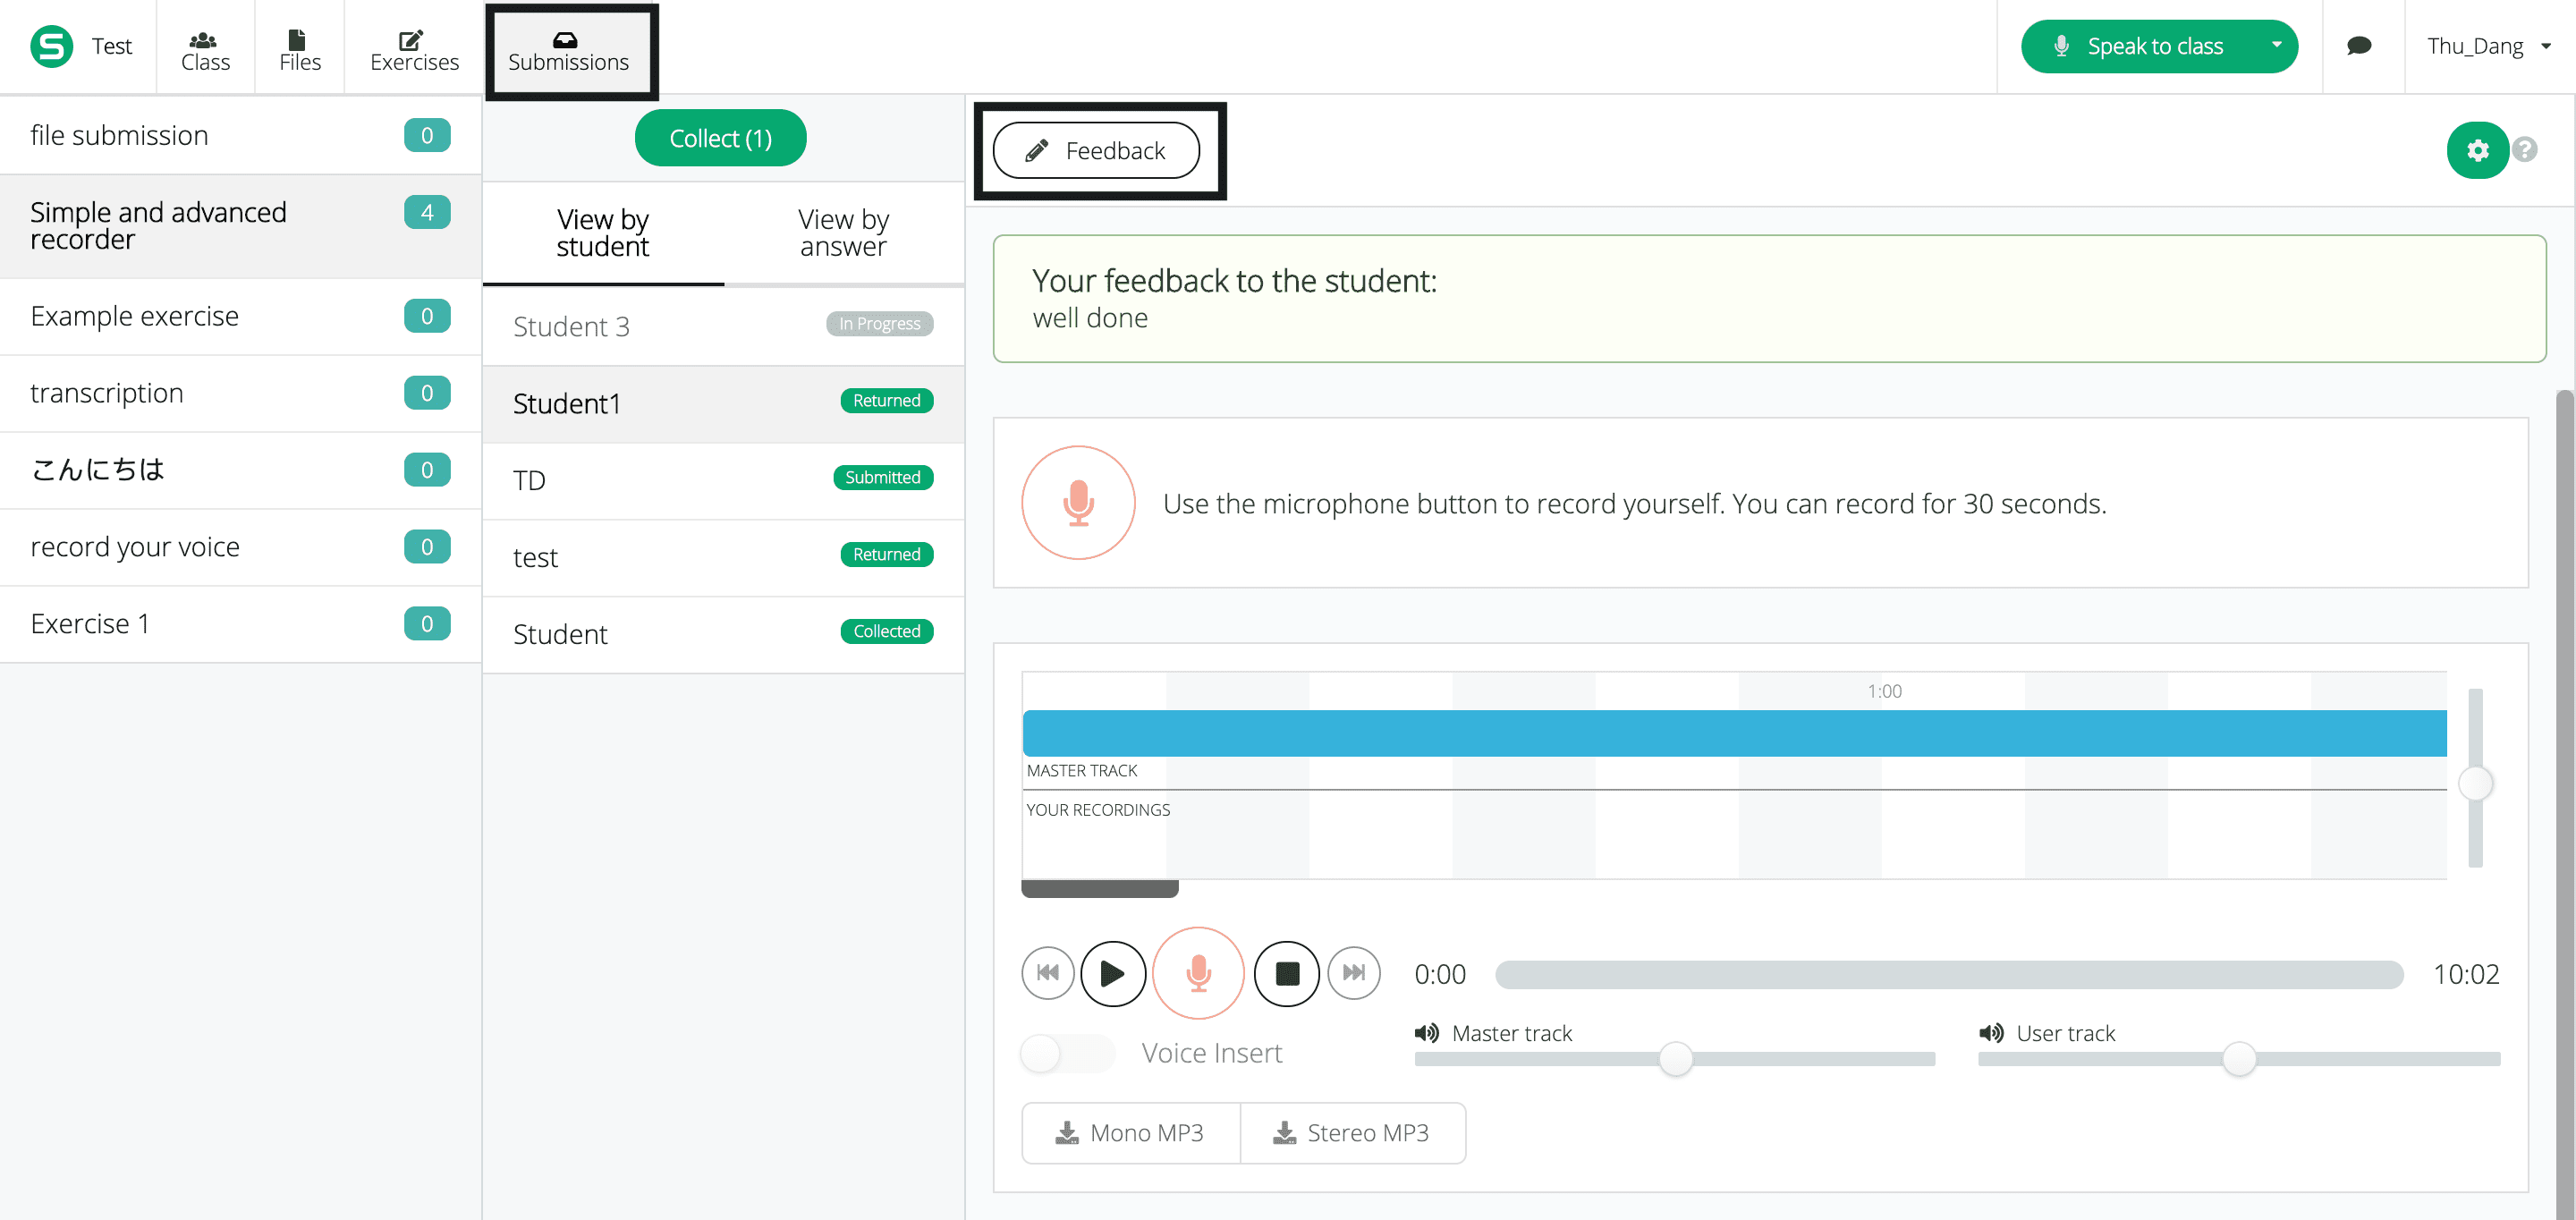
After writing his/her comment, a teacher can simply choose Send Feedback to send it to the student.
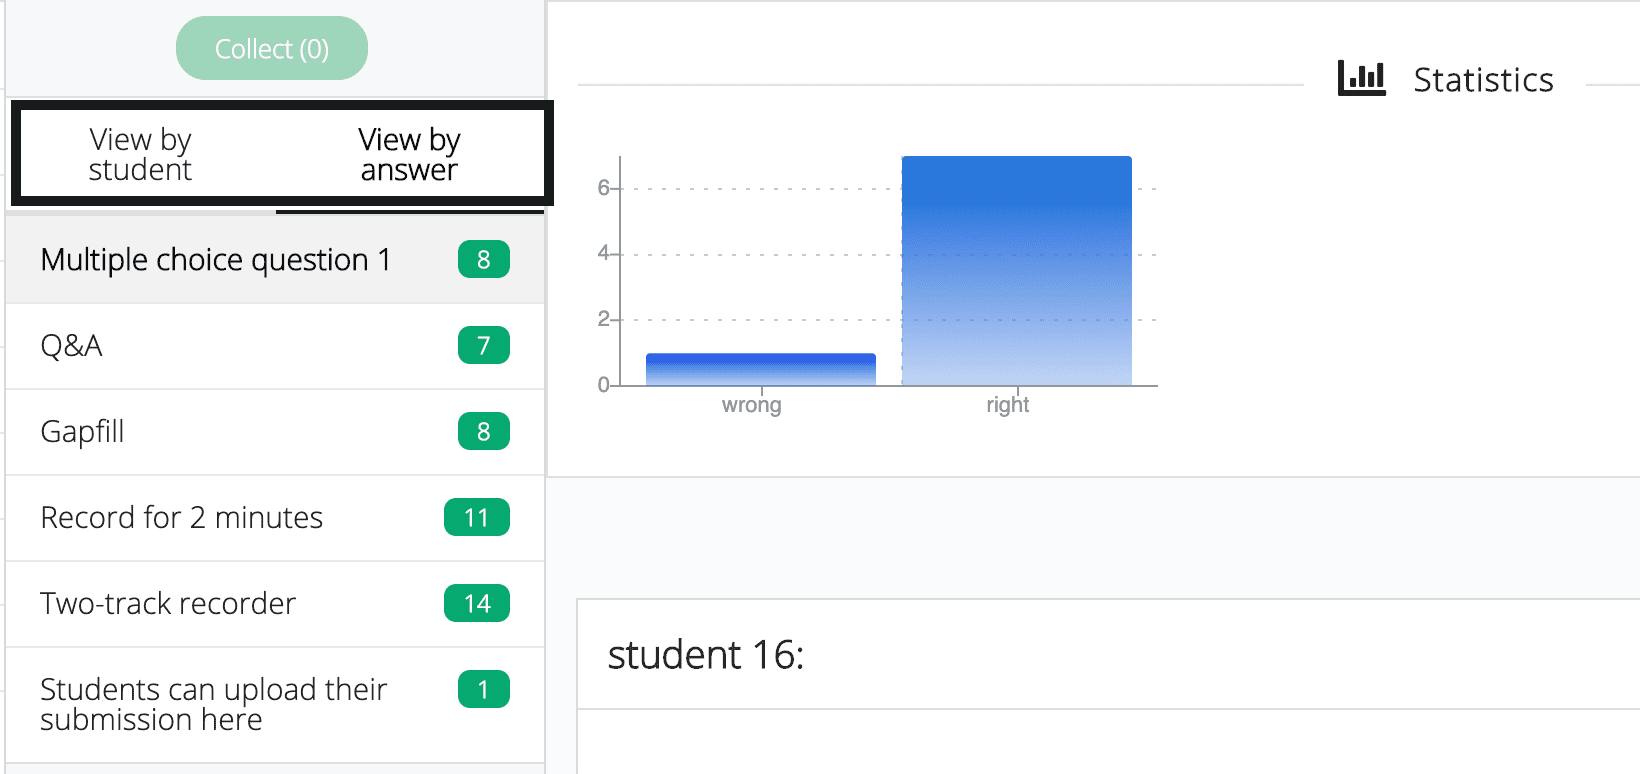
Teachers can also choose to view all recordings at once or viewing answers of each individual students. Switching between these view can be done using the slider highlighted in the picture below:
Difference between “Send back” and “Reset”
Send back: The student’s progress is preserved and he/she can continue working on the exercise.
Reset: The student will need to redo the whole exercise from the beginning as all progress is deleted.
Creating and sharing exercise templates
You can easily create exercise templates from exercises you have already created, create new templates and even share the templates with other teachers within your organisation. The exercise templates also include all the files you have used when creating the exercise, so they are a very convenient way of setting up sessions quickly, and you only have to create the exercises once.
Creating a template from an existing exercise
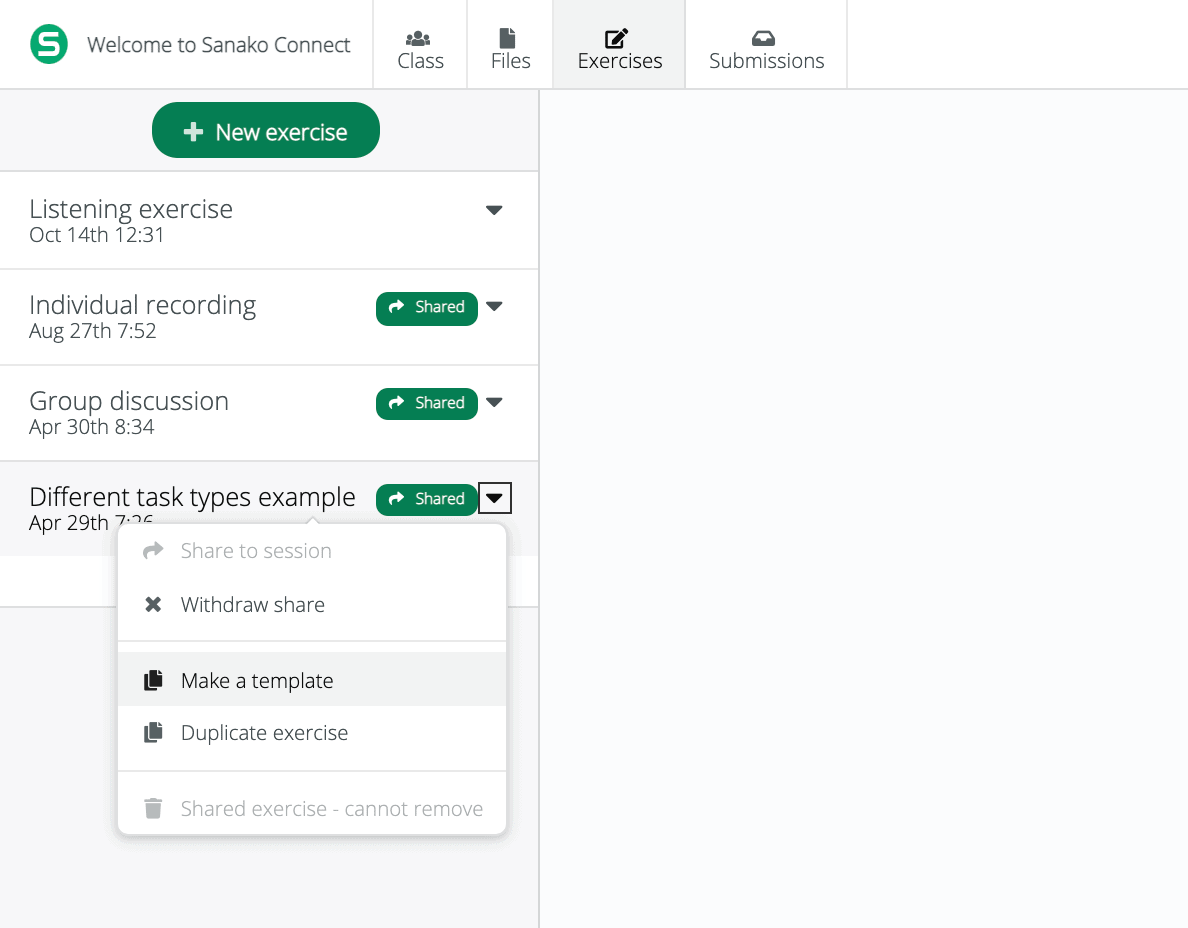
If you want create a template from an existing exercise, simply access the session, choose the exercise and select the option Make a template.
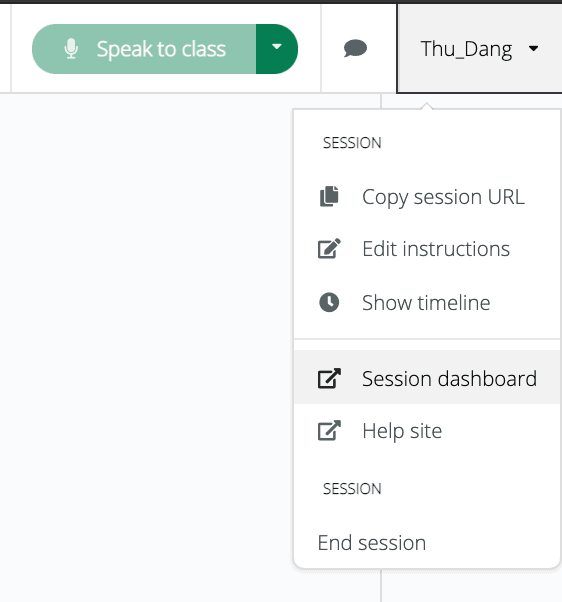
Next, open the Session dashboard view:
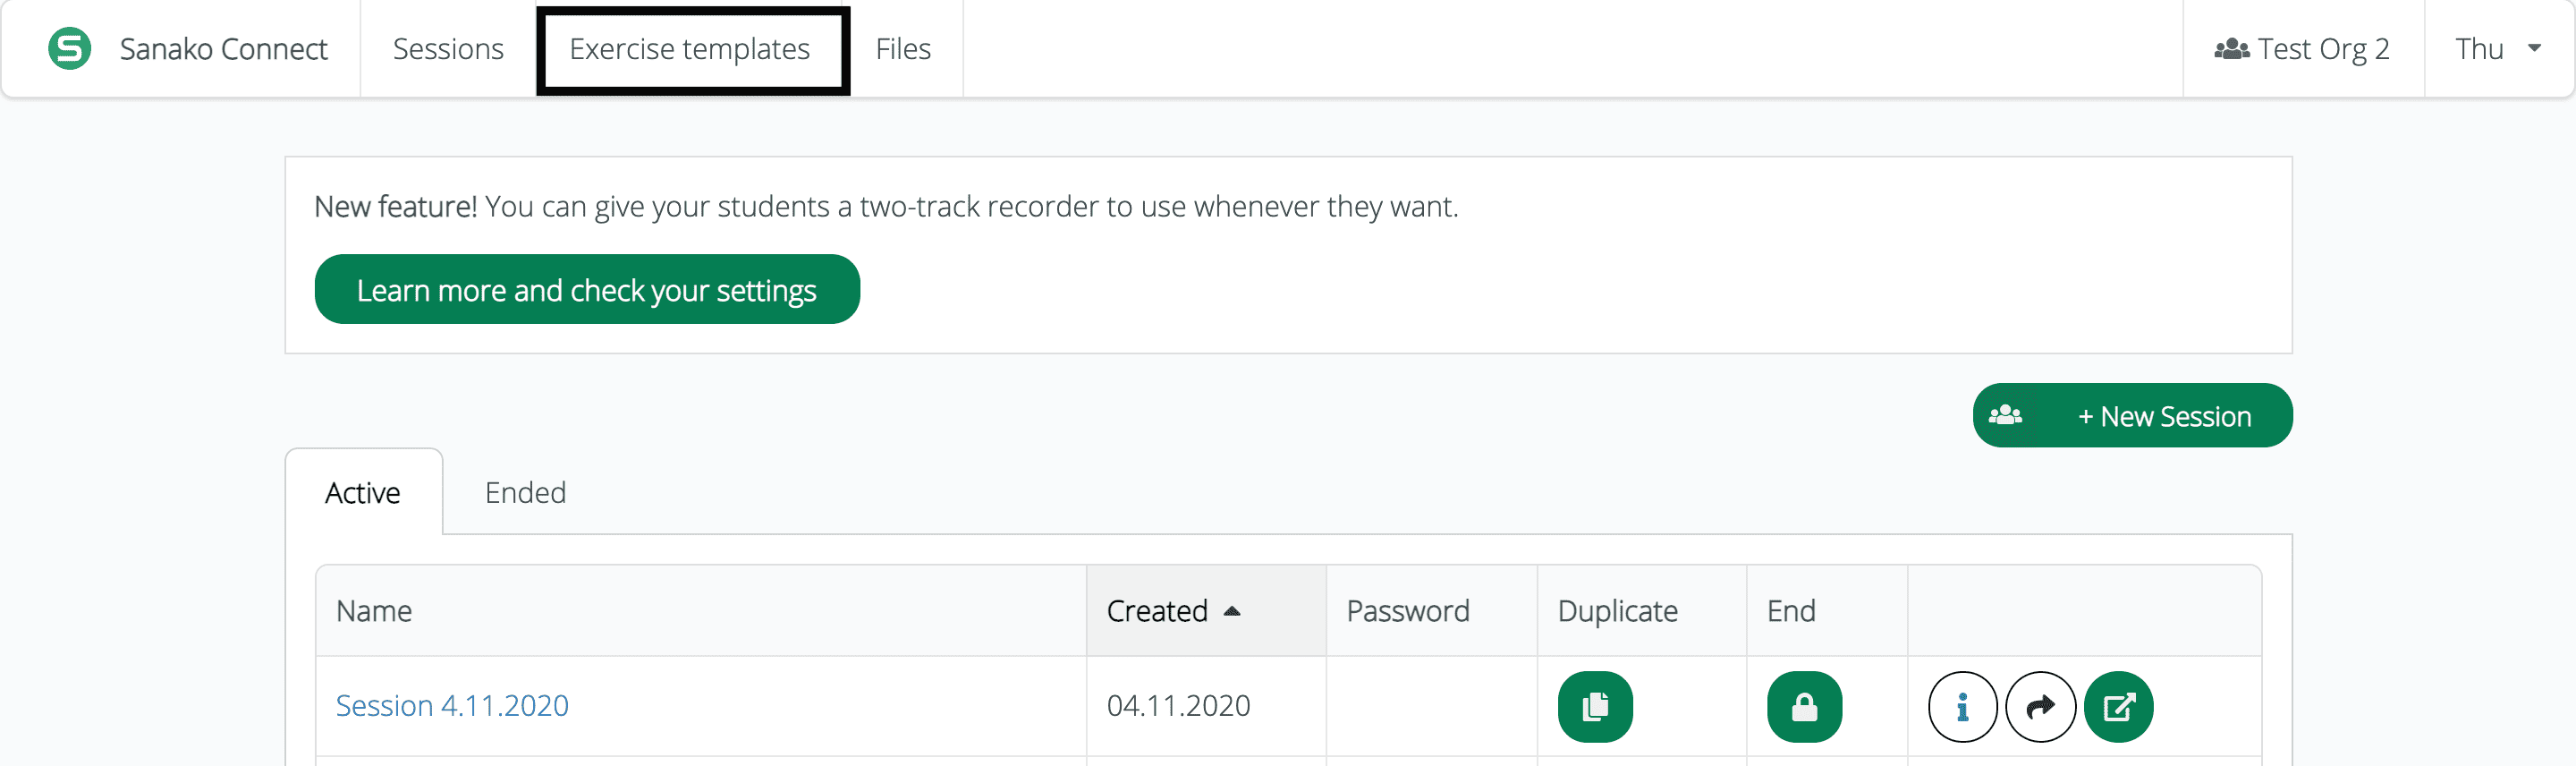
When arriving at the Session dashboard, select Exercise templates.
You can then view your templates from the My templates tab.
Creating a new exercise template
From the Exercise templates tab, under My templates, you can create a new template by clicking New template.
Creating the new template is similar to creating a normal exercise.

Importing an exercise template
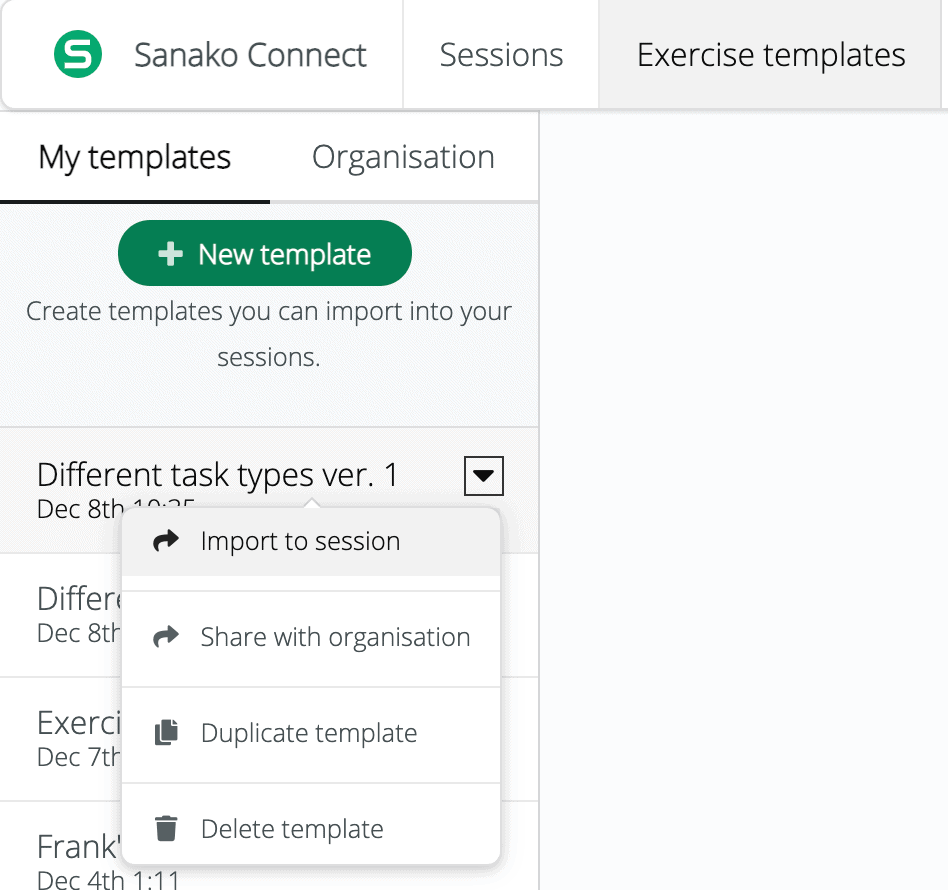
Each template within My templates can be imported into any of your session with the option Import to session.
This can be used when you want to use an exercise for multiple sessions. You can either create a new template or import an existing one so that you can reuse one exercise for different sessions.
Sharing exercises within your organisation
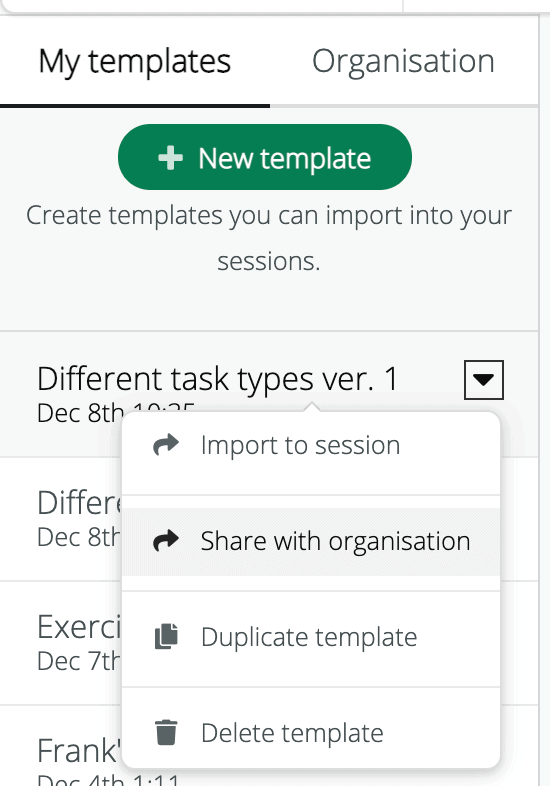
You can make your exercise templates available to all the other teachers within your organisation by selecting Share with organisation from the menu.
Importing shared exercises
You can view the exercises shared within your organisation by choosing the Organisation tab.
Choose Import to my templates to import any exercise template that you want to save and use.
After that, the template will be available under My templates.
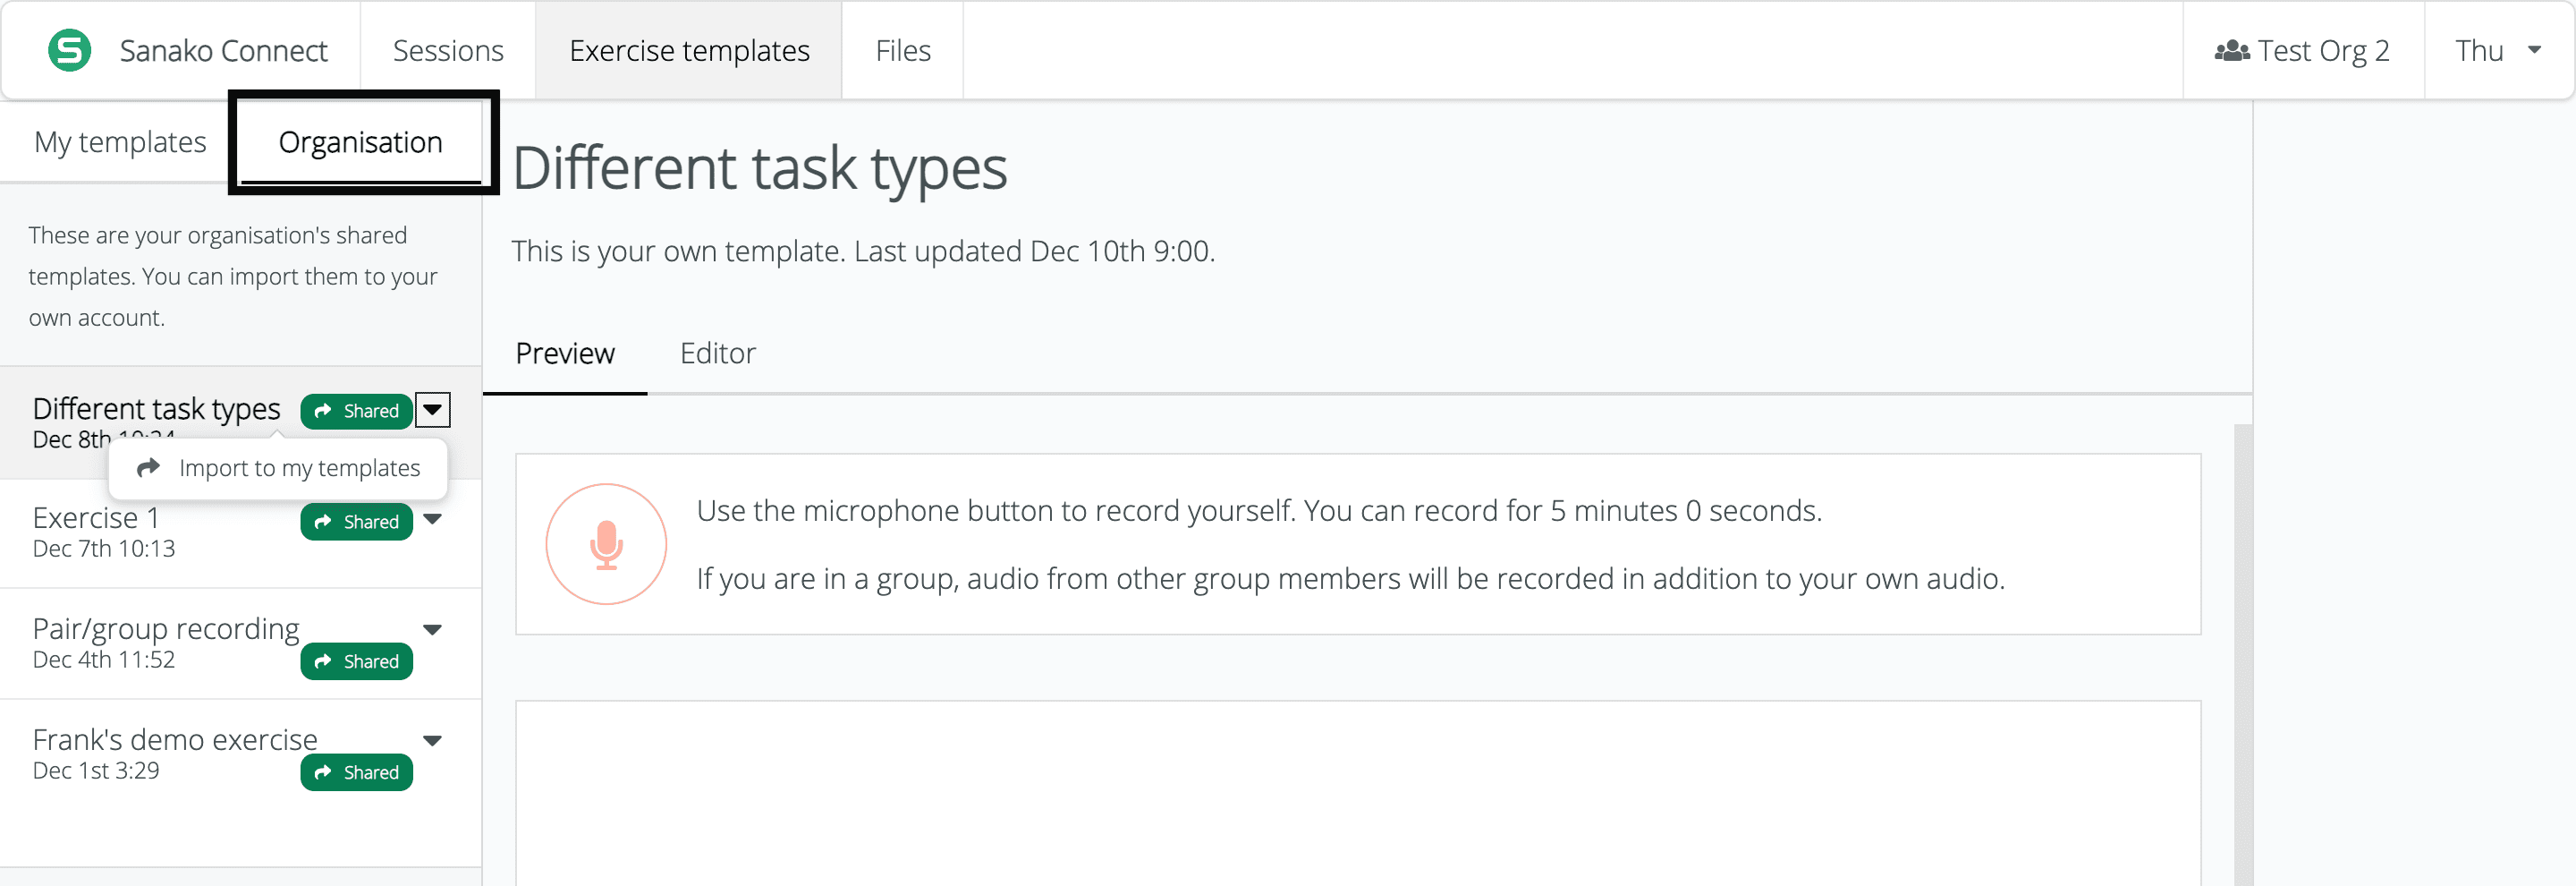
For templates made by your colleagues, Sanako Connect will show the username of the creator and the time the template was last updated. You can also easily import the templates using the quick access button as shown in the picture below:
All files included in the templates can be found in the Files tab from the Session view.
Note: The files uploaded here can only be seen by you. For files to be shared with organization, they need to be embedded into a template shared with the whole organisation. In turn, whenever you import a template shared by your colleague, the system will automatically import files within that template.
Ending a session
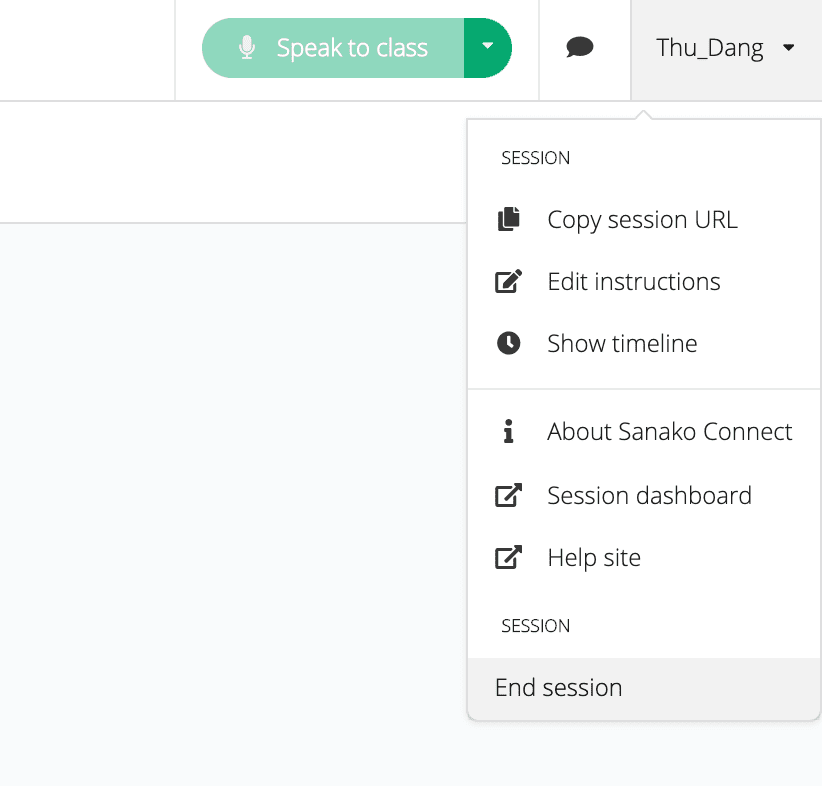
To end a session, you can select End session from the dropdown menu under your name on the top right corner of the screen.
Please note that ending a session means that students won’t be able to access any materials in that session anymore as well as not being able to submit exercises. We suggest that teachers only end a session at the end of a course to avoid problems such as not collecting all students’ submissions.
A session will only end when teachers select End session. Closing a browser or turn off a computer won’t end a session and students will still be able to access shared files and submit exercises, while teachers can always come back and edit the session at any time.
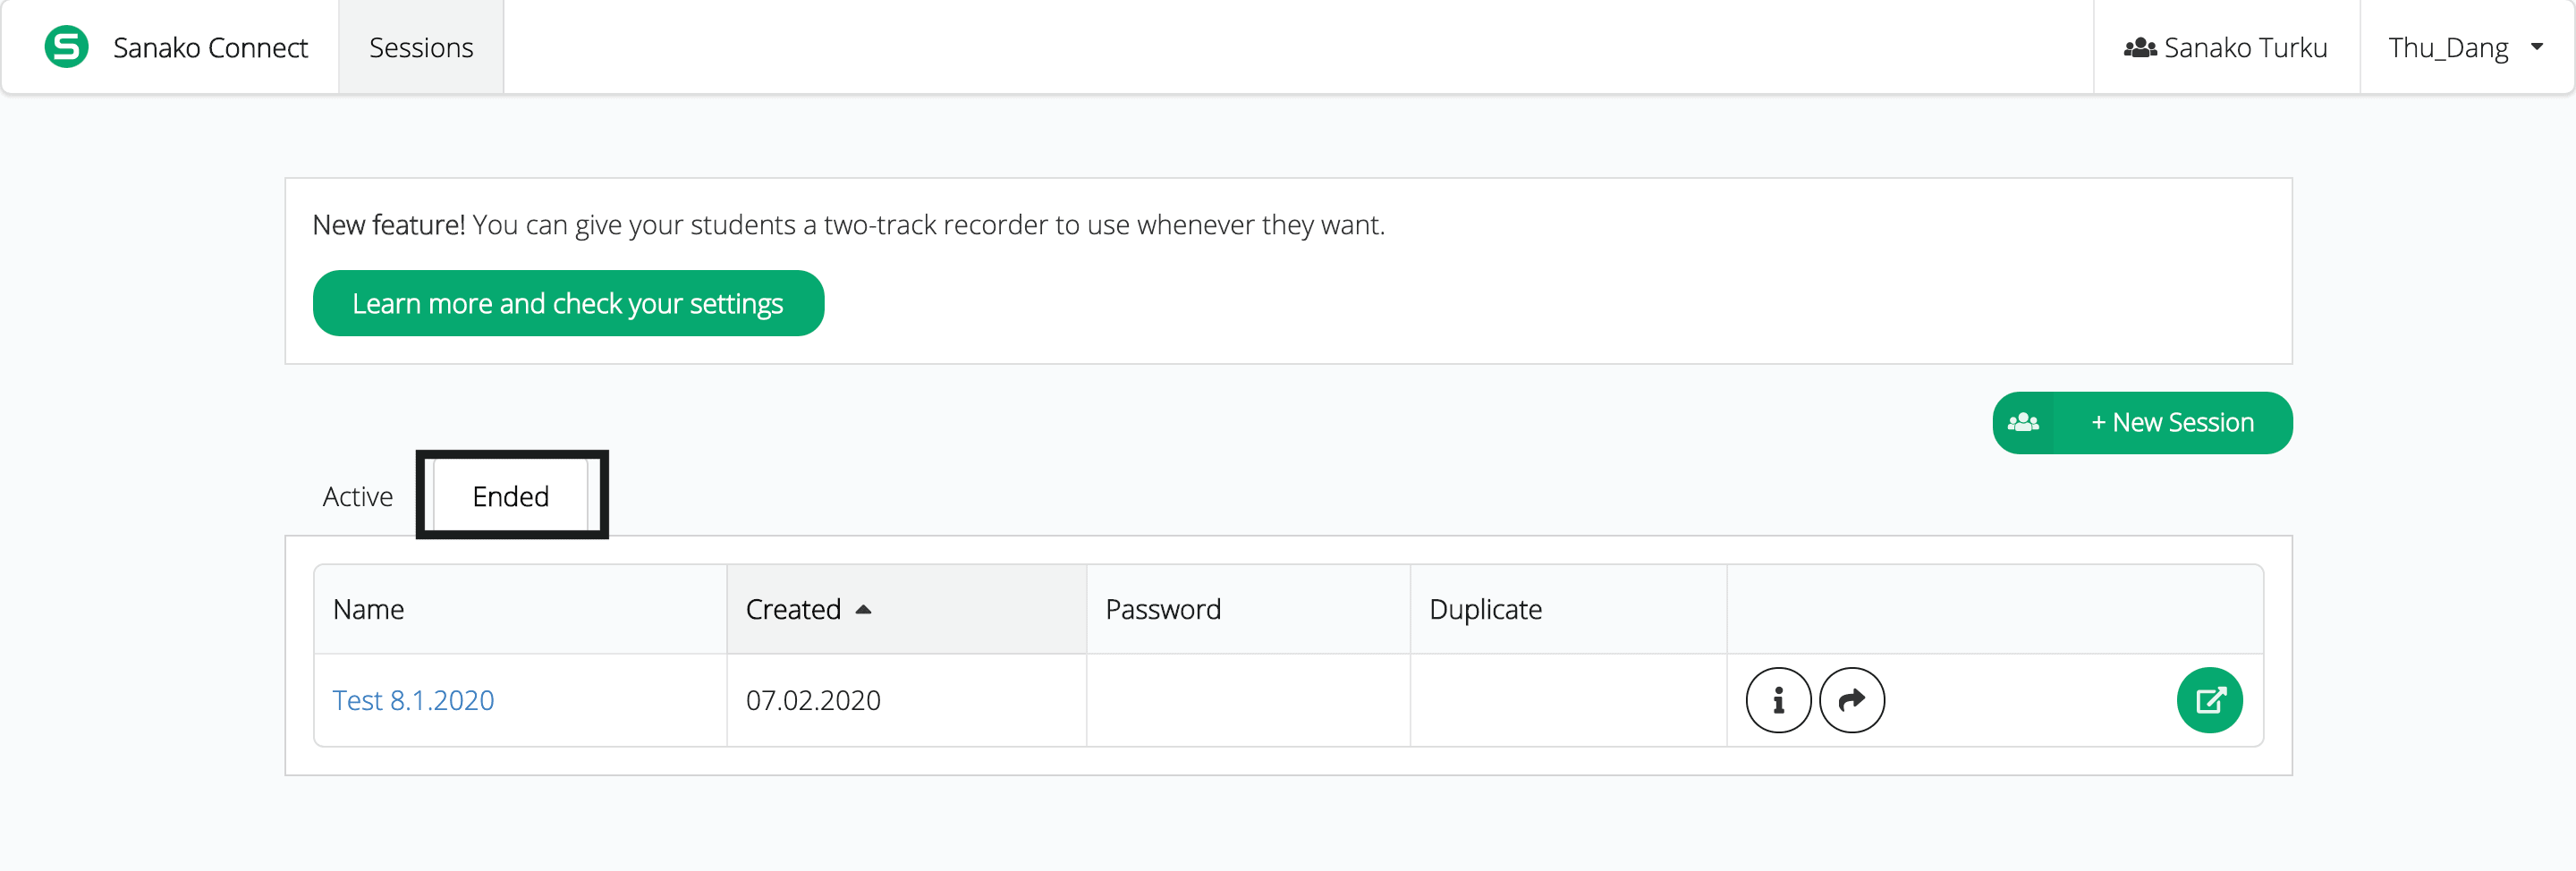
After a session has ended. You can view it after logging in under the Session tab.
Retrieving a student profile
It is strongly recommended that a student uses the same device and browser for the whole time attending a course on Sanako Connect (Google Chrome is the most suitable one, except for iPads when Safari is the recommended browser). This is to ensure that the system can record all a student’s progress without disruption. However, in case a student does not follow this, the teacher will have to assist him/her.
This is especially the case when a student reports the following message:
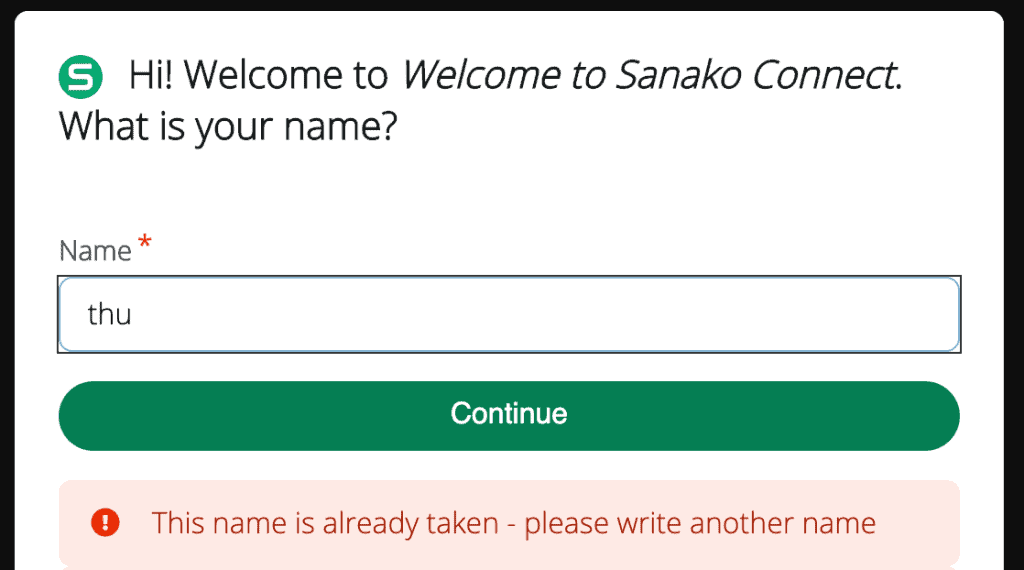
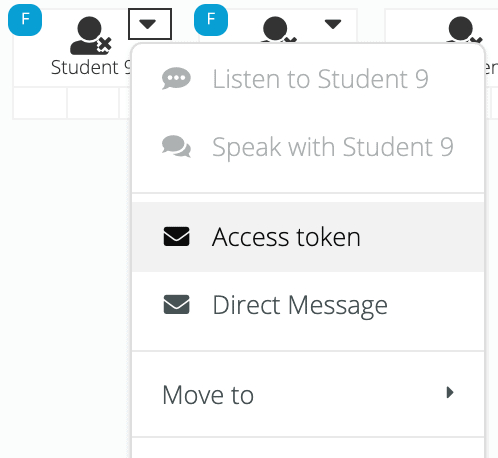
Teacher will first need to retrieve a student’s profile token by clicking on that student’s icon and select Access token:
After that, the teacher will need to give out the student’s profile token and tell him/her to follow the steps in Section 5 of the Student Guide.
Note: When a student has 2 profiles and are using them both to submit exercises, this should be carried out carefully. Retrieving an old profile means replacing the newer one totally, deleting all submission related to the newly created profile. You should retrieve an old profile using a totally new created profile on a new device/browser only in this case.
Contact for Support
When encounter problems, please reach out to your local reseller for the best timely support (Please find your local reseller here) or email support@sanako.com.
When reporting your problem for support, it is important to include the following information:
- Please make sure you are using Chrome browser (or Safari if it’s an iPad). When reporting the problem, please write down the Device type (Computer, tablet, iPads, etc) + Operating system (Windows, iOS, Android, etc.) + Browser used.
- Detailed description of the problem (are you a teacher or a student, what you were doing, is the issue related to streaming, playing, or recording audio, and if its about an exercise, what exercise type, etc.)
- Screenshot/Screen recording
- Session URL together with a password if that session is password-protected.
- If you are a teacher reporting a problem that a student encounters, please specify that student’s username inside the session.